
Clothing Product Images — 8 Shots Every Ecommerce SKU Needs in 2026
A category-wise, data-driven image plan from Uniqs Studio — the exact shot count for every apparel SKU, colourway and sales channel.
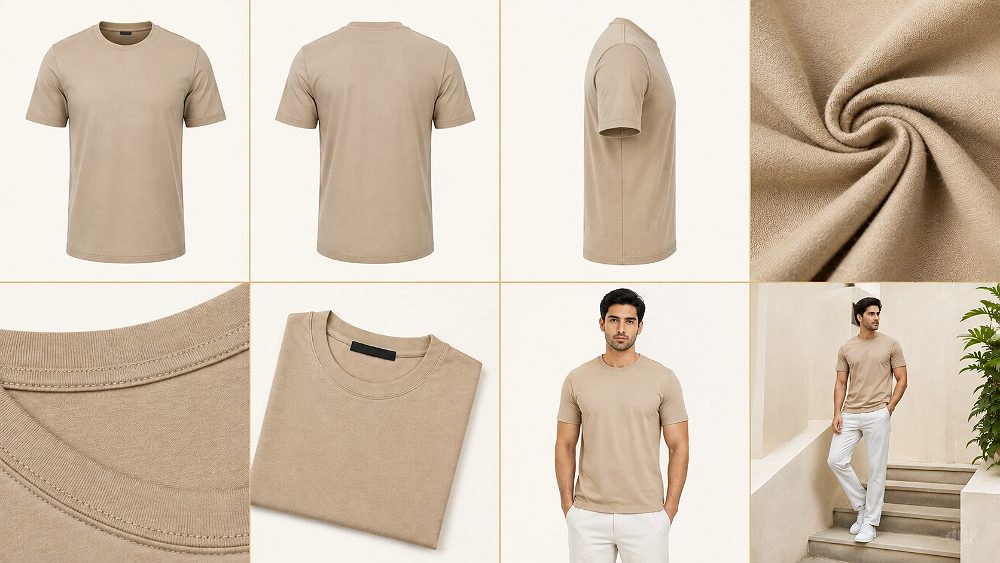
Every founder we meet asks the same question — kitne photos chahiye per clothing SKU? At Uniqs Studio, after shooting apparel catalogues across Delhi NCR for over nine years, the answer is not a single number. The right count of Clothing Product Images depends on ticket size, category, colourways and where the SKU actually sells. This guide gives a defensible baseline of 6–8 images per SKU, a category-adjusted count, and a 4-factor formula you can apply to your own catalogue. Whether you sell through a complete garment photography workflow or plan shoots in-house, this framework helps you stop under-shooting and over-shooting on the same day.
Key Takeaways
- Baseline: 6–8 Clothing Product Images per SKU for most apparel; 4–5 for basics; 10–12 for premium and ethnic wear.
- Every set follows the same architecture — 1 primary + 3 supporting + 2 detail + 1–2 context frames.
- Each colourway needs its own primary image; detail shots can be reused when construction is identical.
- Shoot to the strictest channel — crop and export down for others; never shoot separate sets per platform.
- Use the 4-factor formula (price, returns, complexity, channel mix) to justify every extra frame.
Quick Answer — How Many Clothing Product Images Does Each SKU Need?
Most apparel SKUs need 6 to 8 Clothing Product Images — one hero shot, three supporting angles, two detail close-ups and one or two on-model or lifestyle frames. Low-ticket basics like tees and innerwear can perform with 4–5 images, while occasion wear, bridal and premium outerwear convert better with 10–12. The number rises with ticket size and construction complexity, not with brand ambition.
| Ticket Size | Example Category | Minimum | Recommended |
|---|---|---|---|
| Under ₹999 | Basics, innerwear | 4 | 5–6 |
| ₹1,000 – ₹2,999 | Casual, fusion | 5 | 6–8 |
| ₹3,000 – ₹7,999 | Occasion, outerwear | 6 | 8–10 |
| ₹8,000+ | Premium, bridal | 8 | 10–12 |
These ranges are drawn from our own catalogue shoots and cross-checked against the SKU-level shot lists we ship weekly. Treat them as a starting point, then adjust with the 4-factor formula below.
Why Clothing Product Images Decide Whether a SKU Sells
Apparel is a touch-first category being sold in a touch-free channel. Your buyer cannot feel the fabric, check the drape or try the size — she can only look. Clothing Product Images are the entire substitute for handling a garment, and the depth of your gallery is what turns a scroll into an add-to-cart. Missing angles do not just fail to convert; they actively push shoppers toward a competitor’s PDP where the outfit is shown more completely.
In our own catalogue work across D2C brands, the pattern is consistent — listings with a complete garment image set outperform bare-bones listings on every meaningful metric. This mirrors the broader UX research from Baymard, whose ecommerce UX studies repeatedly find image completeness among the top drivers of PDP trust for apparel.
Image Count vs Conversion Rate
Adding Clothing Product Images lifts conversion up to a point, then flattens. The steepest jump comes moving from 3 to 6 frames — that is when the shopper first sees the back, side and fabric. Between 8 and 12 the curve gently rises for premium and ethnic wear because embellishment and drape deserve more real estate. Beyond 12, most shoppers stop swiping and additional frames merely add page weight. Studios that plan a fashion catalogue shoot end-to-end almost always land in this 6–12 band per SKU.
Image Gaps Are the Hidden Cause of Apparel Returns
Every apparel return tagged not as expected is really an image failure. The shopper bought based on incomplete visual data — no true colour reference, no fabric texture, no back view of that neckline. A tighter garment image set with honest fit, fabric and construction frames reduces this return category more than any copywriting change. Our own work on ecommerce apparel imagery consistently shows returns dropping the quarter after a brand upgrades its image set, especially in ethnic and occasion wear where drape and embellishment matter most.
The Anatomy of a Complete Garment Image Set
The most useful reframe for founders is this — stop asking how many Clothing Product Images and start asking which ones. Every complete apparel gallery is built from three tiers of images, each doing a different job for the buyer. The Primary tier sells the outfit at a glance. The Supporting tier answers the technical questions. The Contextual tier proves how the garms will actually look and fit in real life. Get all three tiers right and the number takes care of itself.
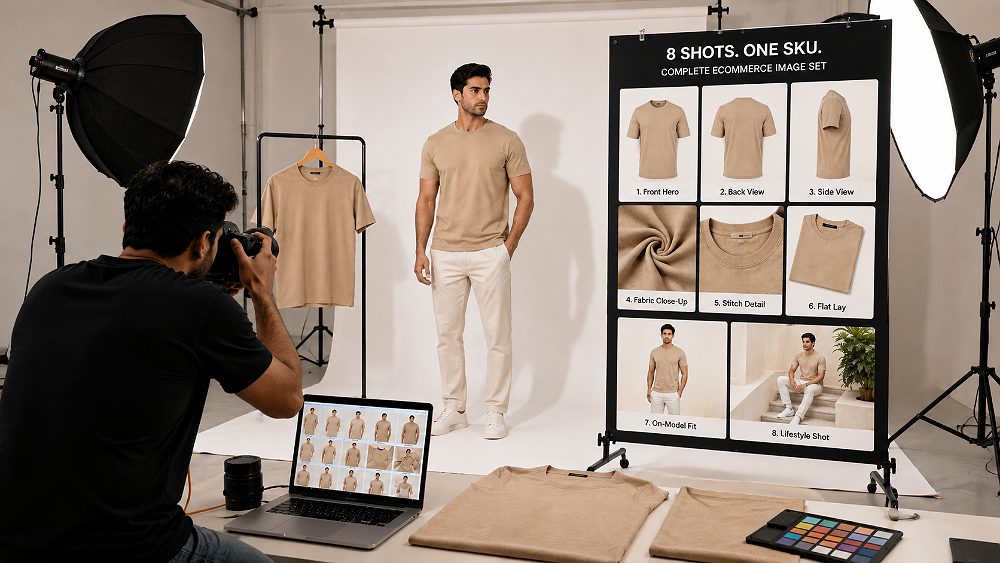
Shot 1 — The Primary Hero Image
The hero is the frame that earns the click on the listing tile. It must render the whole garment cleanly, at the correct proportion, with true colour. For most apparel we shoot the hero on ghost mannequin against pure white so the piece stands on its own without a distracting face or pose. Explore our invisible mannequin photography services if you need this look at scale. The hero shot doubles as your marketplace-compliant primary image and your PDP thumbnail, so it earns every rupee spent on styling and lighting.
Shots 2–4 — Core Supporting Angles
These three frames answer the shopper’s technical questions — what does the back look like, how does it drape from the side, where does the hem sit. Include a straight back view, a true side view and a three-quarter angle. This is the single most-skipped section in Indian apparel catalogues; teams cut it under shoot-day pressure and pay for it in returns. Our standard SKU shot list locks these three frames as non-negotiable, and we treat them with the same lighting and crop discipline as the hero.
Shots 5–6 — Detail and Fabric Close-Ups
A macro of the fabric weave and a close-up of construction — collar, cuff, embroidery, print scale, stitch quality — do the job that a good in-store touch does. These frames prove the clothes are worth the price. Colour accuracy is critical here; a warm cast on a cotton shirt drives thousands in returns. Studios that follow a strict professional post-production workflow colour-check every detail frame against a physical reference before delivery.
Shots 7–8 — Fit, Scale and Lifestyle Context
The final two frames prove how the outfit lives on a body. One clean on-model fit shot with a well-briefed model, and one lifestyle image showing the apparel in its intended context — office, event, wedding, weekend. This is where professional model photography pays back the most, especially for D2C brands whose website depth exceeds marketplace slots. Even for basics we recommend one on-figure frame; scale reference alone lowers returns on tees and shirts.
When to Add a Video or 360° Spin Instead of a 9th Image
Once the eight-shot set is complete, a short product video or 360° spin adds more value than a ninth still frame. Video communicates drape and movement — critical for sarees, dupattas, dresses and outerwear. If your PDP allows both, use ecommerce video production to add one 8–15 second clip per SKU rather than more static frames.
| Shot | What It Proves | Mandatory? | Reuse Across Colourways? |
|---|---|---|---|
| Hero Front | Shape, silhouette, primary colour | Yes | No |
| Back View | Neckline, drape, back detail | Yes | No |
| Side Angle | Depth, cut, sleeve fall | Yes | Sometimes |
| Fabric Macro | Weave, texture, sheen | Yes | Often |
| Construction Detail | Stitch, trim, embroidery | Yes | Often |
| Flat Lay | Styling, layering, accessories | Optional | Sometimes |
| On-Model Fit | Scale, proportion, drape on body | Yes | No |
| Lifestyle Context | Occasion, aspiration, mood | Optional | Yes |
Not sure which frames your category needs? See how we build complete image sets for D2C brands. Call +91-8076745824 or WhatsApp us +91-8076745824.
Clothing Product Images by Apparel Category
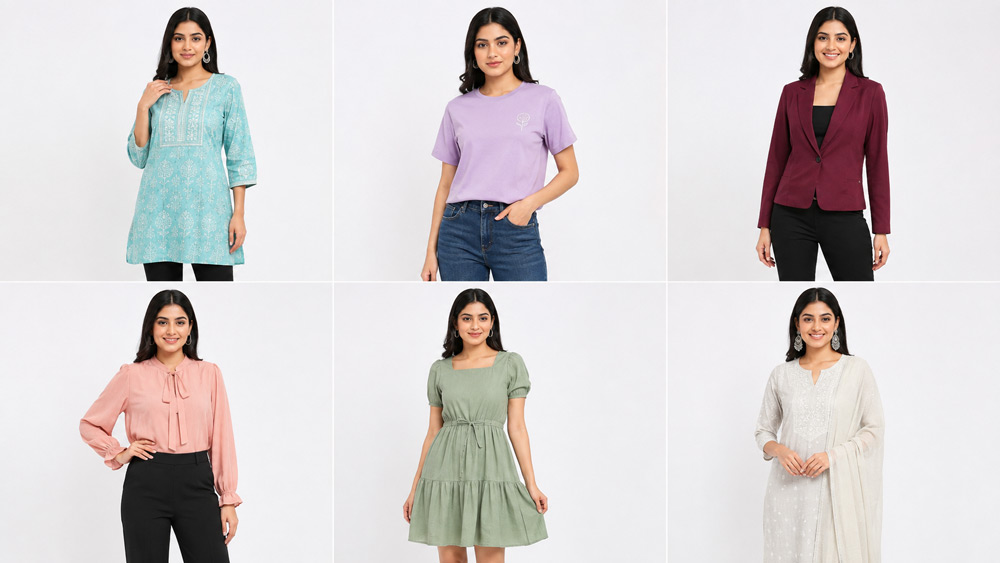
Construction complexity drives shot count more than anything else. Drape-heavy and embellished garments need more frames; simple basics need fewer but sharper ones; kidswear needs scale reference; lingerie needs discretion in the on-figure frame. The table below is the working guide we use inside Uniqs Studio for every category briefing — a defensible starting point before applying the 4-factor formula.
| Category | Primary | Angles | Detail | Model/Context | Total |
|---|---|---|---|---|---|
| T-Shirts & Tops | 1 | 2 | 1 | 1 | 5 |
| Ethnic Wear | 1 | 3 | 3 | 2 | 9–10 |
| Denim & Bottomwear | 1 | 3 | 2 | 1 | 7 |
| Outerwear & Jackets | 1 | 3 | 2 | 2 | 8 |
| Kidswear | 1 | 2 | 1 | 1–2 | 5–6 |
| Lingerie & Loungewear | 1 | 2 | 2 | 1 | 6 |
Everyday Basics — T-Shirts, Tops and Innerwear
For basics, 4–6 Clothing Product Images is enough. Use ghost mannequin for the hero and back, add one clean flat lay to show styling, and one fabric macro. A single on-figure frame with scale reference lifts add-to-cart on tees and tanks significantly. Explore our flat lay photography services for basics-heavy catalogues where volume-per-day matters as much as per-image quality.
Ethnic Wear — Sarees, Kurtas and Lehengas
Ethnic clothing needs the most frames because drape, pallu, embroidery and dupatta styling are all separate decision points for the buyer. Plan 9–11 images per SKU — hero, three drape angles, two embroidery macros, one full-length model shot, one back view and one lifestyle. Our bridal ghost mannequin work shows how detail frames can turn a ₹15,000 lehenga listing into a genuine consideration set.
Denim and Bottomwear
For denim, wash accuracy and hardware detail matter as much as fit. Plan seven frames — hero front, back, side, waistband macro, pocket/rivet detail, one flat lay and one on-model fit shot. Return rates on jeans respond strongly to a real leg-line frame; the flat lay is optional if that fit shot is strong.
Outerwear, Jackets and Winterwear
Outerwear needs a lining shot, a layering context frame and a clean hero that reads the silhouette. Eight images typically covers it — hero, back, side, lining, cuff detail, fabric macro, on-model layered and one lifestyle. Weight and warmth are hard to convey visually; a good macro of the shell fabric plus a labelled lining detail solves most of the sizing complaints.
Kidswear and Infant Apparel
Kidswear buyers scan quickly and buy across sizes at once. Keep the image count tight — 5–6 clean frames — but include one age-appropriate scale reference in the flat lay and a soft fabric macro. Parents worry about fabric safety more than styling.
Lingerie, Loungewear and Sleepwear
Lingerie and loungewear need discretion in the on-figure frame. Use ghost mannequin for the hero and back, fabric macros for lace and elastic detail, and one styled flat lay. If the brand’s positioning supports it, an on-model frame can be added; otherwise, a clean mannequin set carries the SKU well.
Marketplace vs D2C Website — Different Image Count Rules
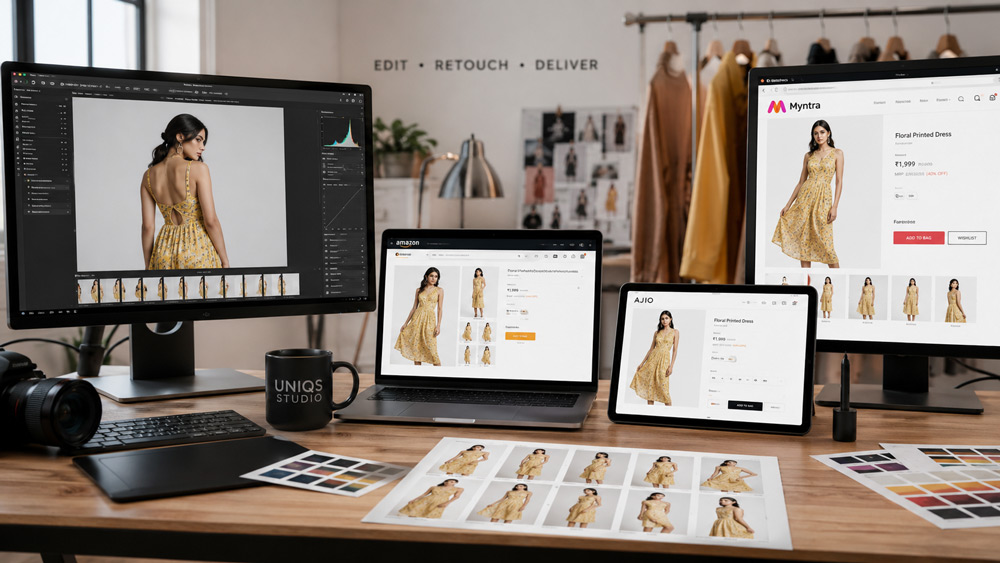
Marketplaces impose format, background and gallery-count rules; a D2C website has no ceiling but a scroll-fatigue floor. The right operating model is to shoot to the strictest specification, then crop and export downward for the others. Never brief a separate shoot per channel — that is how brands double their photography spend without doubling revenue.
Marketplace Gallery Limits and Practical Counts
Each Indian marketplace has its own gallery depth and background rules — Amazon India insists on pure white primary; Myntra prioritises on-model frames; Flipkart and Meesho have their own SKU-level guidelines that shift periodically. Always verify the latest specs on Amazon Seller Central India and each platform’s seller hub before every shoot. Our marketplace-ready garment photography service ships one master set with per-platform export presets so brands stay compliant without re-shooting.
A practical upload plan for a multi-channel brand looks like this — Amazon India 5–7 images, Myntra 6–8, Flipkart 5–7, Ajio 4–6, Meesho 4–5. Every one of those uploads comes from the same 8-shot master file, cropped and exported per spec. A properly briefed fashion photography for ecommerce workflow turns this into a repeatable weekly process instead of a project.
Shopify and D2C Product Page Image Strategy
On your own Shopify or WooCommerce store, use every relevant frame from the 8-shot set plus one video. There is no cap, but there is a fatigue point around 12 frames. Structure the gallery so the buyer’s decision unfolds — hero, on-model, back, side, fabric, detail, lifestyle, video — and never load images uncompressed. Compression discipline and lazy loading matter as much as shot selection; a heavy PDP breaks Core Web Vitals and quietly kills conversion. Founders exploring the full workflow can benefit from our complete garment photography guide for ecommerce before their next catalogue drop.
SKU-Level Planning — Colourways, Sizes and Variants
Sizes almost never need separate frames. Colourways almost always need their own primary and one supporting angle. Detail shots can be reused when the fabric, trims and stitching are truly identical across the colourway. This distinction is the single biggest lever on shoot budget for D2C brands — and the one most in-house teams get wrong.
How Many Clothing Product Images Per Colourway
Give every colourway a fresh hero and one supporting angle at minimum, so the shopper sees the real shade in the primary tile and confirms it in a second frame. Fabric macros and construction details typically travel across colourways safely; embroidered or printed pieces do not. For a 40-SKU launch in three colourways each, that is roughly 40 × 3 × 6 = 720 frames the naive way — but with a smart reuse policy the same catalogue lands closer to 430 frames without any loss of PDP quality. That is a real budget saving, not a shortcut.
When to Reuse Images and When to Reshoot
Reuse when: the construction is identical, trims are identical, fabric weave reads the same, and colour is the only variable. Reshoot when: the print or embroidery differs, the fabric weave changes (linen vs cotton in the same silhouette), or the model’s colouring interacts materially with the outfit. When in doubt, reshoot the hero and back only, and reuse the rest — that is the compromise our production floor lands on most often.
The 4-Factor Formula to Set Your Own Image Count
Start every SKU at a base count of 6 images. Add or subtract using four factors — price point, historical return rate, category complexity and sales channel mix. Cap the total at 12. This gives every brand a defensible, portable rule for shot planning that a founder, catalogue manager or agency can apply without a photographer in the room.
Factor 1 — Price Point
Low ticket: -1 or 0. Mid ticket: 0. Premium (₹5,000+): +2 to +4. Higher-priced apparel deserves more scrutiny; buyers zoom, compare and read images longer at ₹8,000 than at ₹800. Premium fabric texture and finish need dedicated frames to justify the price.
Factor 2 — Return Rate History
Under 15% category returns: 0. Between 15–30%: +1. Over 30%: +2 to +3. Categories with high fit complaints — ethnic, denim, occasion — reward every extra frame that shows real fit, drape and construction. Add on-model and detail frames first before adding hero variations.
Factor 3 — Category Complexity
Simple (tees, basics): -1. Moderate (shirts, dresses): 0. Complex (sarees, lehengas, layered outerwear): +2 to +3. Complexity earns extra frames for drape, layering and embellishment. This is the single biggest driver of the count difference between a t-shirt SKU and a bridal lehenga SKU.
Factor 4 — Sales Channel Mix
Single channel: 0. Multi-marketplace: +1. Marketplace + D2C site: +2. More channels demand more frames to fill the strictest gallery, and one strong master set beats channel-specific mini-sets on both cost and consistency.
Worked Examples
- ₹699 basic tee, low returns, single-channel D2C: 6 – 1 + 0 – 1 + 0 = 4 images. Round to 5.
- ₹2,499 fusion kurta, moderate returns, Amazon + Myntra: 6 + 0 + 1 + 0 + 1 = 8 images.
- ₹9,999 lehenga, high returns, marketplace + D2C: 6 + 3 + 2 + 3 + 2 = 16 → cap 12.
Cost and Production Planning for Clothing Product Images
The cost of Clothing Product Images is driven by SKUs and setups, not raw image volume. Flat lay batching handles 40–60 SKUs a day; ghost mannequin 25–40 SKUs; model shoots 12–20 SKUs at premium quality. Hidden costs — steaming, styling, model fees, hair and makeup, retouching, colour correction — usually double a naive per-image quote. Ask any studio for a cost-per-SKU quote, not a cost-per-image quote, when you plan.
Shoot Time and Throughput Per SKU
A properly briefed catalogue day at Uniqs Studio processes 25–40 apparel SKUs on ghost mannequin including detail macros, or 12–20 SKUs on model with styling. Batching by garment type — all shirts together, all dresses together — lifts throughput 20–30% because lighting and styling stay stable. Founders can benchmark realistic timelines through our published garment photography cost guide for 2026–27 before signing off on shoot dates.
Cost Per Image vs Cost Per SKU
The per-image quote is a trap. Two studios can quote ₹300 per image and one delivers 6 usable frames while the other delivers 4 — the true cost-per-SKU tells the real story. Ask for cost per SKU including detail macros and one on-model frame, ask for the reject rate, and ask for the delivery format. For pricing benchmarks across shoot types, see our Delhi fashion photography cost guide.
Clothing Product Images Packages — Uniqs Studio Delhi NCR
- 4 images per SKU
- Ghost mannequin front + back
- 1 flat lay + 1 detail shot
- White background, marketplace crops
- 5–7 working days
- 6–8 images per SKU
- Ghost mannequin front/back/side
- 2 detail macros + 1 flat lay
- 1 on-model shot included
- Marketplace + D2C exports
- 10–12 images per SKU
- Full model shoot, multiple poses
- Ghost mannequin + detail macros
- Styling, HMU coordinated
- 7–10 working days
- Custom image count per SKU
- Dedicated shoot team, 100+ SKUs
- Video & 360° spin add-ons
- CDN-ready exports, metadata
- Priority weekly batch delivery
Not sure which package fits your catalogue? Send your SKU list — Satyam will recommend the image count and share a per-SKU quote within 24 hours.
6 Mistakes That Inflate Image Count Without Adding Sales
More frames do not mean more sales. Some of the most common gallery mistakes we see in Indian D2C apparel catalogues are wastage, not richness. Fixing them cuts shoot cost and improves the PDP simultaneously.
- Near-duplicate angles. Two frames 10° apart add zero decision information. Cut one.
- Lifestyle images that hide the product. Aspirational is fine; obscuring the outfit is not.
- Inconsistent crops across SKUs. A catalogue reads as unprofessional when every hero has a different frame ratio.
- Over-retouched colour. Boosted saturation drives returns; every threads and print must match the physical sample.
- Text or graphic overlays on marketplace hero. Automatic listing rejection on Amazon and Flipkart.
- Uncompressed files on the PDP. Heavy images break Core Web Vitals — see Google’s Core Web Vitals guidance for the load-time cost.
These are all common issues we identify in apparel listings that look unprofessional — the fixes are almost always cheaper than adding more frames.
Per-SKU Clothing Product Images Checklist
Pre-Shoot
- Garment steamed and lint-free
- All SKUs tagged with codes
- Colour reference card ready
- Styling notes per outfit
- Model measurements confirmed
During Shoot
- All 8 frames captured
- Consistent crop across SKUs
- Colour card in first frame
- Focus checked at 100%
- Backup captured to second card
Post-Shoot
- Colour matched to physical sample
- File naming: SKU-shot-colour
- Compressed WebP + JPG delivery
- Alt text with focus keyword
- Per-platform crop presets applied
Follow this per-SKU checklist and your catalogue drop will be marketplace-ready on day one. For a printable version aligned with our model photoshoot preparation checklist, drop a note to [email protected] and the team will send it across.
Frequently Asked Questions About Clothing Product Images
How many Clothing Product Images does each SKU need?
Do more product images always increase conversions?
How many images do I need for each colour variant?
Are separate photos required for every size?
How much does it cost to shoot Clothing Product Images per SKU in India?
Final Recommendation — Build the Set Once, Sell Everywhere
Shoot one complete master set of Clothing Product Images per SKU — built to the strictest channel spec, cropped and exported for every other channel from the same source. Audit your gallery quarterly against actual return data; add frames where returns cluster around a specific complaint. That is the entire discipline, and it is the difference between a catalogue that funds itself and one that quietly leaks budget.
Uniqs Studio has run this playbook across Delhi, Gurgaon, Noida and Faridabad for D2C brands, marketplace sellers and manufacturers. Send your SKU list to [email protected], WhatsApp +91-8076745824, or call Satyam directly on +91-8076745824 for a per-SKU image plan and quote.
Shoot the set once. Sell it everywhere.
Talk to Uniqs Studio about your next apparel catalogue — serving D2C brands across Delhi, Gurgaon, Noida, Faridabad and Ghaziabad.