
A menswear model shoot shot list is the one page that decides whether your shoot day produces a clean, sellable catalogue or a folder of nice-looking but useless frames. Men’s clothing is bought on fit: where the shoulder seam sits, how the shirt drops at the hem, whether the kurta length hits the knee, and how the denim breaks at the ankle. If a buyer cannot read those details, they return the product. This guide is built for brands planning male model photography for shirts, kurtas and jeans, and it gives you the exact poses and angles to brief your photographer with.
At Uniqs Studio, our in-house team in Kalkaji, New Delhi has spent 9+ years shooting catalogues for 500+ D2C brands and marketplace sellers, and menswear is one of the categories where a written plan saves the most time. Below, Satyam breaks down the 12-shot list we use, how it changes for shirts, kurtas and denim, the camera heights that keep proportions honest, and a checklist you can print and carry to the set.
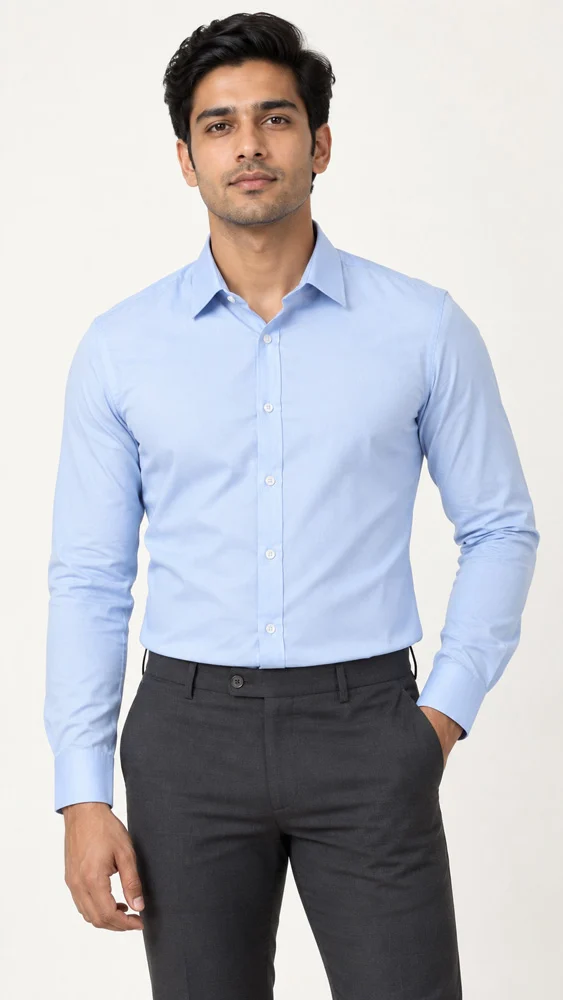
- A good menswear model shoot shot list covers 12 frames: four core catalogue views, four fit-and-movement poses and four detail or lifestyle shots.
- Shirts sell on collar, shoulder and cuff; kurtas sell on length, side slits and fabric fall; denim sells on rise, seat and the break at the ankle.
- Keep camera height at mid-torso for full-length frames so the model’s legs and the garment length are not distorted.
- Most marketplaces need 5 to 7 images per style, so shoot all 12 and pick the strongest set for each channel.
- Real male models still beat AI-generated models for fit accuracy, which is what keeps returns low.
What Is a Menswear Model Shoot Shot List?
A menswear model shoot shot list is a written plan of every pose, angle and close-up you need for each men’s garment, agreed before the shoot starts. It tells the photographer, stylist and model exactly which frames to capture so every SKU in the catalogue looks consistent and shows fit clearly.
Think of it as a contract between your brand and the set. Without it, a shoot drifts: the model does a few fashionable poses, the photographer chases a nice mood, and three hours later you discover there is no back view of half the shirts. With it, every style gets the same sequence, the editor knows what to expect, and your product pages look like they belong to one brand.
A complete list for men’s apparel usually has four parts: the core catalogue views every marketplace needs, the fit and movement poses that answer sizing doubts, the detail close-ups that prove fabric and finish, and one or two lifestyle frames for ads, A+ content and social media. The 12-shot menswear model shoot shot list below covers all four.
Why Do Shirts, Kurtas and Denim Need Different Shot Lists?
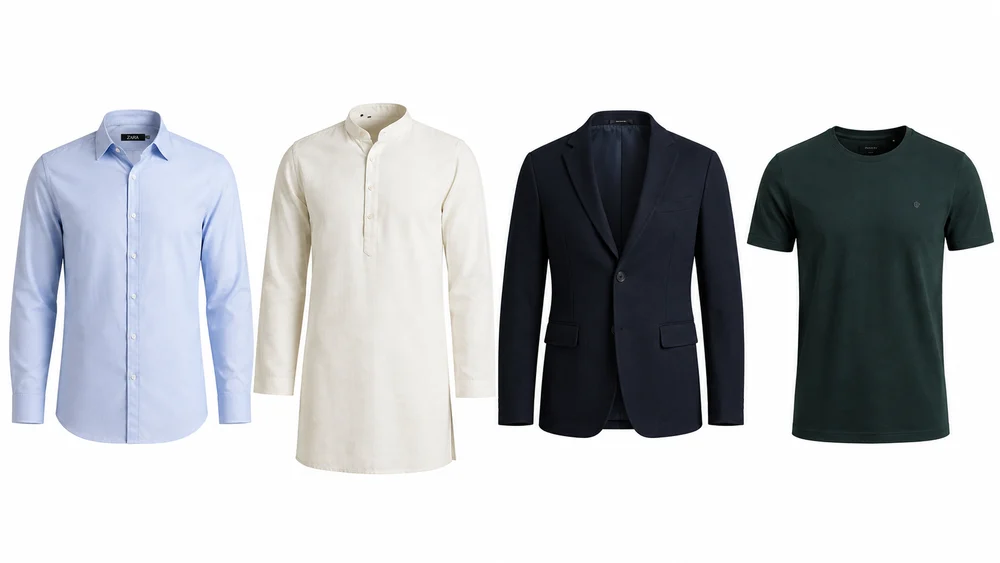
Each category answers a different buyer question. A shirt buyer worries about collar, shoulder and sleeve length; a kurta buyer worries about length, slits and drape; a denim buyer worries about rise, seat fit and how the hem breaks over shoes.
That is why we never reuse one generic pose set across a menswear catalogue. A raised-arm pose that is perfect for showing the stretch of a casual shirt hides the side slits of a kurta. A seated pose that sells a pair of relaxed chinos crumples a crisp formal shirt. The base list stays the same, but two or three frames swap depending on the garment.
| Category | Buyer’s main doubt | Must-have frames | Frames to avoid |
|---|---|---|---|
| Formal shirts | Collar, shoulder seam, sleeve length | Straight front tucked, collar close-up, cuff detail | Heavy arm movement that pulls the placket |
| Casual and printed shirts | Fit (regular vs slim), print scale, untucked length | Untucked front, three-quarter, print close-up | Tight crops that hide the hem |
| Kurtas and kurta sets | Length, side slits, fabric fall, set contents | Full-length front, side view, walking pose | Seated poses that bunch the fabric |
| Jeans and cargos | Rise, seat fit, taper, hem break | Back view, side view, hip-height detail | Shirt pulled over the waistband |
The 12-Shot Menswear Model Shoot Shot List
Shoot these 12 frames for every men’s style: four core catalogue views, four fit and movement poses, and four detail or lifestyle shots. You will not publish all twelve on every channel, but shooting the full set once means you never need a reshoot when a marketplace asks for one more angle.
| # | Shot | Pose / angle | What it proves |
|---|---|---|---|
| 1 | Straight front, full length | Feet hip-width, arms relaxed, eyes to camera | Overall fit and colour |
| 2 | Three-quarter front | Body turned 30–45°, weight on back leg | Shape and side seam |
| 3 | Side profile | Full 90° turn, arms slightly forward | Length, rise, drape |
| 4 | Straight back | Back to camera, head slightly turned | Yoke, back pockets, seat |
| 5 | Hand-in-pocket | One hand in pocket, relaxed shoulders | Natural fit, casual styling |
| 6 | Walking step | Mid-stride, front foot forward | Movement and fabric fall |
| 7 | Arms-raised or sleeve roll | Adjusting cuff or rolling sleeve | Stretch, sleeve length |
| 8 | Seated or leaning | On a stool or against a wall | Comfort, everyday wear |
| 9 | Upper-body crop | Chest-up, slight angle | Collar, neckline, buttons |
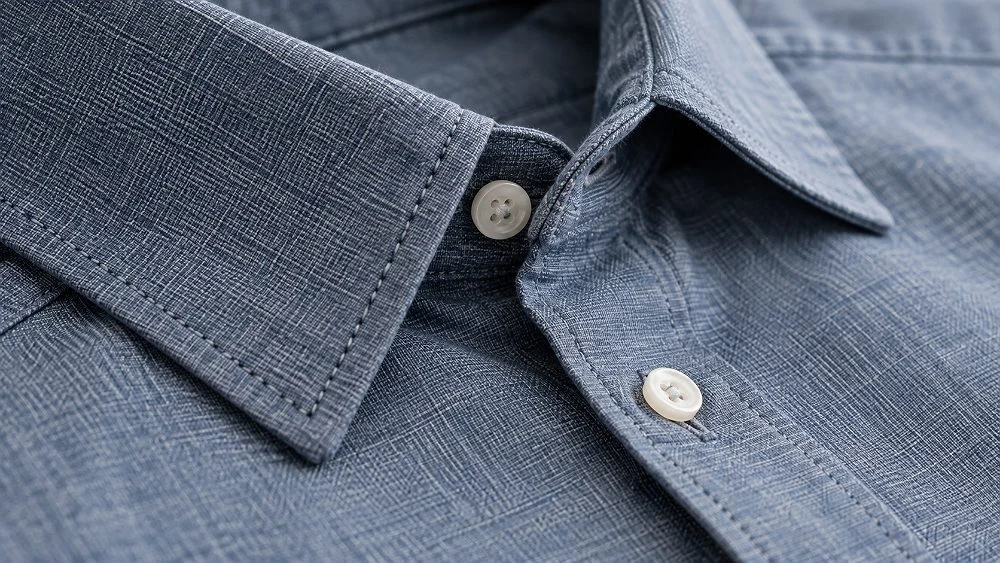
| 10 | Fabric close-up | Macro on weave, print or embroidery | Texture and quality |
| 11 | Trim detail | Cuff, pocket, rivet, label or slit | Finish and construction |
| 12 | Lifestyle or styled look | Full outfit with accessories | How to wear it |
Core Catalogue Shots for the Menswear Model Shoot Shot List (1–4)
The first four frames are non-negotiable. The straight front becomes your main image on most marketplaces, so the model stands square with feet hip-width apart, arms relaxed at the sides and a neutral, confident expression. The three-quarter turn shows the garment’s shape and side seam, which is where slim and regular fits look different. The side profile answers length questions for kurtas and rise questions for jeans, and the straight back shows yoke, pleats, back pockets and seat fit, which many sellers forget.
Fit and Movement Poses (5–8)
Frames five to eight are where a catalogue starts to feel human. A hand-in-pocket pose relaxes the shoulders and shows how a shirt sits when worn naturally. A walking step shows how a kurta or a linen shirt moves. A sleeve-roll or arms-raised frame proves stretch and sleeve length, and a seated or leaning pose suits chinos, joggers and casual shirts. Keep these poses controlled: the goal is to show the garment, not to produce an editorial magazine spread.
Detail and Lifestyle Shots (9–12)
The last four frames build trust. An upper-body crop shows collar shape and buttons, a fabric close-up proves weave or print quality, and a trim detail shows the cuff, pocket, rivet or embroidery that justifies your price. The final styled look, with shoes, a watch or a jacket, gives buyers an outfit idea and doubles as an ad creative. For many brands we pair these with on-model fashion shoots for the women’s line so the whole store keeps one visual language.
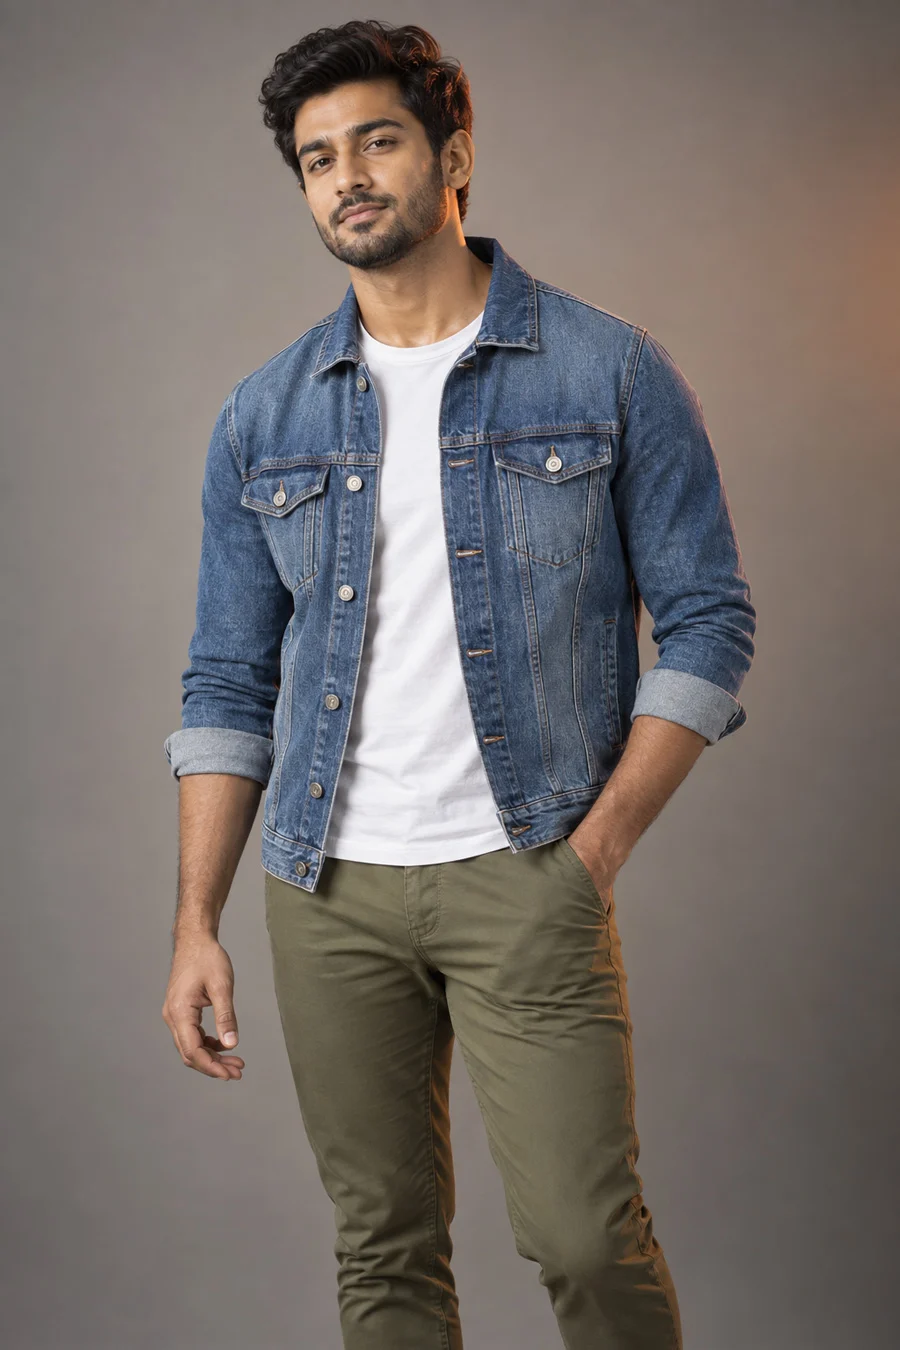
How Should a Male Model Pose for Shirts?
For shirts, keep the pose simple and the shoulders square so the collar, placket and shoulder seam stay clean. Shoot formal shirts tucked with minimal arm movement, and casual shirts untucked with one or two relaxed poses that show fit and sleeve length.
Shirts are the most common menswear category we shoot, and they are also the most unforgiving. A slightly lifted shoulder pulls the placket off-centre; a crossed arm creases the chest; a model who leans back makes a regular-fit shirt look baggy. These are the male model poses for shirts that work best on a catalogue set.
Formal Shirts: Tucked, Square and Sharp
- Straight front, tucked: belt centred, placket aligned with the belt buckle, sleeves falling naturally to the wrist.
- Three-quarter with cuff check: the model lightly touches the opposite cuff, which shows sleeve length without pulling the shoulder.
- Collar crop: chest-up, top button open or fastened as per the style, collar points symmetrical.
- Back view: shows the yoke, box pleat or darts that separate a premium formal shirt from a basic one.
Casual and Printed Shirts: Untucked and Relaxed
Casual shirts need one more layer of life. We shoot the straight front untucked, then add a hand-in-pocket three-quarter, a sleeve-roll frame and a walking step. For printed shirts, the fabric close-up is vital because buyers want to see print scale; a full-length image alone makes small prints look like plain colour. These shirt photoshoot ideas for ecommerce keep the frames practical while still looking modern.
Which Kurta Model Shoot Poses Work Best?
The best kurta model shoot poses are full-length and upright: a straight front, a side view that shows the slits and length, and a gentle walking step that shows how the fabric falls. Avoid seated and crossed-leg poses, which bunch the fabric and hide the hem.
Men’s ethnic wear has a different rhythm from shirts. Buyers are often shopping for a function, so they want to see the full look, including pyjama, churidar or dhoti, and footwear that matches. The length of the kurta relative to the knee is the single most asked question, so the side profile matters more here than in any other category.
Straight Kurtas and Short Kurtas
- Front, hands relaxed: shows neckline, placket and embroidery placement.
- Side profile: shows length and side slit; ask the model to keep the arm slightly forward so it does not cover the slit.
- Walking step: the slit opens naturally and the fabric movement sells linen, cotton and silk blends.
- Embroidery close-up: neckline, cuff or hem work at macro distance with soft raking light.
Kurta Sets, Nehru Jackets and Festive Menswear
For sets, add one frame that clearly shows every item the buyer receives, and for Nehru jacket combos shoot the jacket open and buttoned. Festive menswear benefits from one lifestyle frame with a mojari or loafer and a subtle prop, but keep the main catalogue images on a clean background. For men’s ethnic wear model shoots, we also capture short garment videos in the same setup, because a 20-second walk shows fabric fall better than any still.
What Denim Model Photoshoot Angles Show Fit Best?
Denim needs the back view, the side view and a hip-height camera angle more than any other menswear category. These three denim model photoshoot angles show rise, seat fit, taper and the hem break, which are exactly the details buyers use to choose between slim, straight and relaxed fits.
For jeans, the top garment is a supporting actor. We style models in a plain fitted t-shirt or a shirt tucked in at the front, so the waistband, button and rivets stay visible. If the top hangs over the waistband, the buyer cannot judge rise, and that is one of the most common reasons denim gets returned.
Slim, Straight and Tapered Jeans
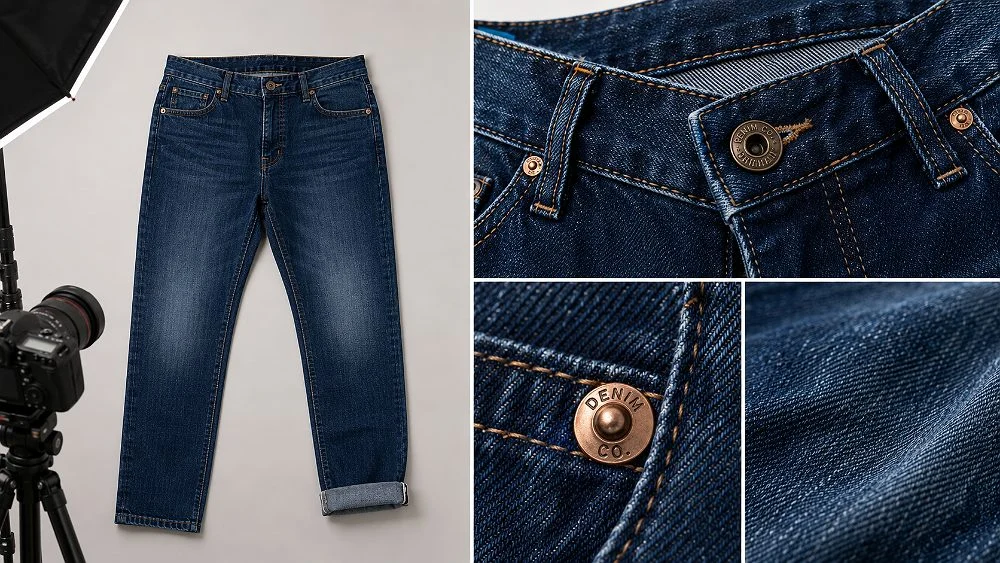
- Front full-length at hip height: camera lens at roughly hip level so the legs keep true proportion.
- Back view: pocket placement and seat fit; this is often the image that convinces a buyer.
- Side view: taper and the break at the ankle over sneakers or boots.
- Thumb-in-pocket three-quarter: a natural, confident denim pose that still shows the waistband.
- Detail strip: rivets, button, back patch area and wash texture.
Cargos, Relaxed Fits and Joggers
Cargo pants and relaxed fits need one extra frame that shows the side pockets with the model’s hand inside, and one walking frame because volume reads best in motion. For joggers, add a crouch or step-up pose to prove stretch. Keep the same camera height across every style, otherwise one pair of jeans will look longer than another in the listing grid.
Set the Camera Height, Lens and Lighting for Menswear
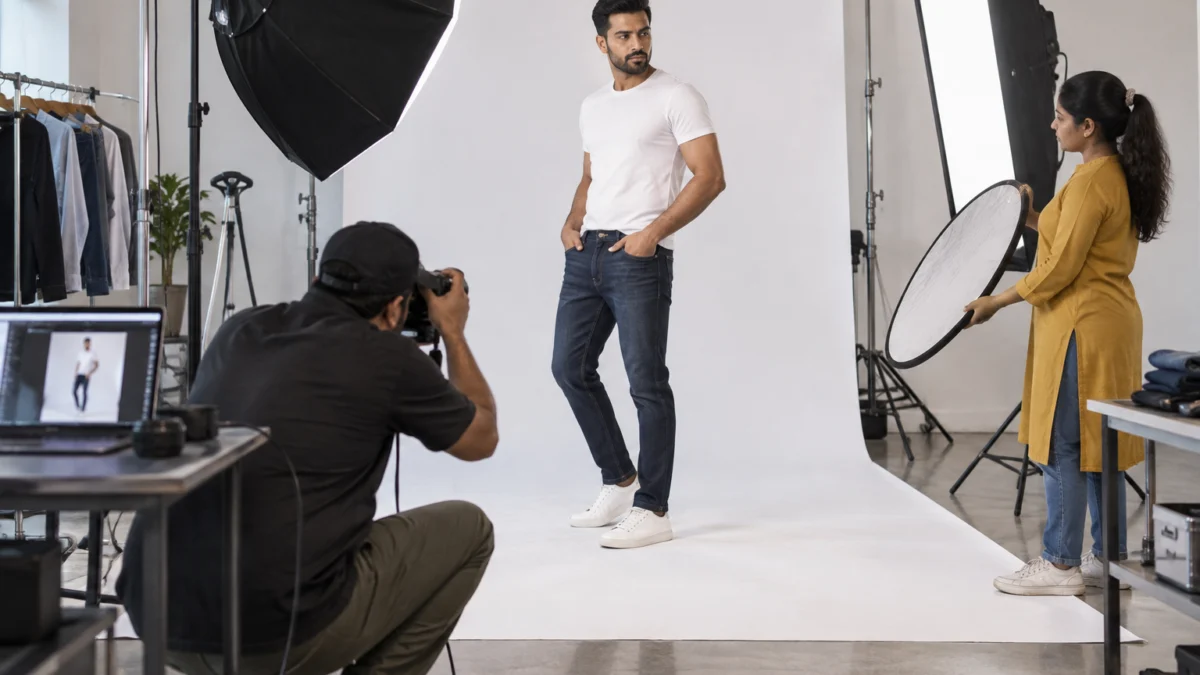
Shoot full-length menswear with a 50–85mm-equivalent lens from mid-torso height, and close-ups with a macro lens. Use soft, even key light with a strip-box rim light so dark shirts and indigo denim keep their shape against the background.
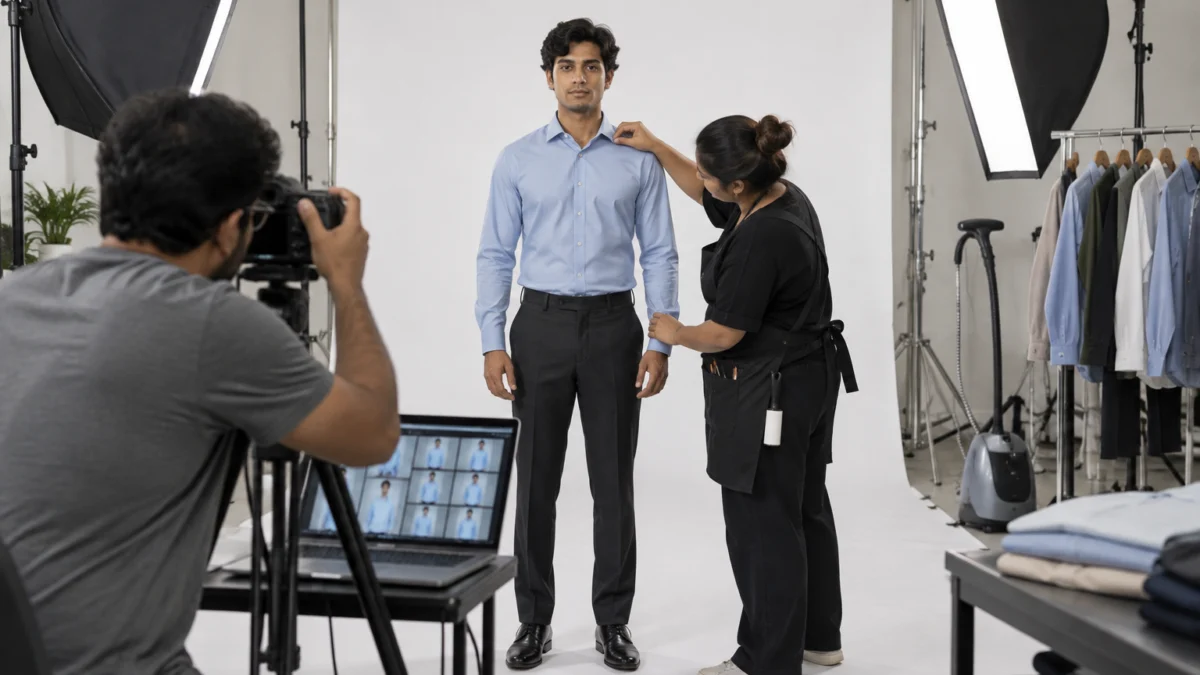
Camera position is the quiet reason some catalogues look premium and others look amateur. Shooting from eye level makes legs look short and trousers look cropped; shooting from the floor makes a model look stretched. At Uniqs Studio we lock the tripod height for the whole day and mark the model’s floor position with tape, so every SKU lines up perfectly in a listing grid.
| Frame type | Lens (full-frame) | Camera height | Lighting note |
|---|---|---|---|
| Full-length catalogue | 50–85mm | Mid-torso to hip | Large octabox key plus fill, even background |
| Upper-body crop | 85mm | Chest | Beauty dish or softbox for collar shape |
| Fabric and trim macro | 100mm macro | Level with detail | Low raking light to reveal weave |
| Lifestyle look | 35–50mm | Chest | Directional key for mood, still colour-true |
For lighting, our menswear set usually runs strobes with strip softboxes as rim lights and a large octabox as key. Dark navy and black shirts need the rim light most, otherwise the shoulders merge into the shadow. Shoot a grey card at the start of every garment colour so the editor can match colour exactly, because wrong colour is a common return reason for shirts and denim.
How Do You Plan a Menswear Model Shoot Day?
Plan the shoot day in the order the garments need to be styled: group by category and colour, prep every piece the day before, and run the same shot sequence for each style. A clear plan lets a good team photograph far more styles in a day without dropping quality.
- Share the style sheet: SKU, colour, size on model, and which of the 12 frames each style needs.
- Prep garments: remove tags, steam, lint-roll and pin; our guide on garment preparation for fashion photography has the full routine.
- Book the right model size: a model who wears your sample size exactly, usually M or 40, avoids clipping and pinning.
- Group the order: formal shirts, then casual shirts, then kurtas, then denim, so lighting changes are minimal.
- Shoot tethered: the brand checks frames live on a laptop and approves each style before it leaves the set.
- Back up and label: files named by SKU and frame number make editing and upload faster.
If you want a broader pre-shoot routine covering model casting, styling kits and approvals, our model photoshoot preparation checklist pairs well with this shot list. Many brands also shoot the same shirts on a ghost mannequin for website consistency, which is why we plan both on the same day.
How Many Menswear Images Does Each Marketplace Need?
Most Indian marketplaces work best with 5 to 7 images per menswear style: front, back, side, a close-up and one or two fit or lifestyle frames. Shooting all 12 frames once lets you build each channel’s set without a second shoot.
Each platform has its own image rules, so always confirm the current requirements in your seller panel. Brands selling on Myntra check the Myntra partner portal, while Amazon sellers confirm main-image rules in Amazon Seller Central. For Myntra specifically, our Myntra model shoot checklist covers that platform’s ratio and framing details.
| Channel | Suggested frames from the 12-shot list | Note |
|---|---|---|
| Myntra | 1, 2, 4, 3, 9 or 10, 6 | On-model front first; consistent framing across styles |
| Amazon | 1, 4, 2, 10, 11, 12 | Main image on white; detail and lifestyle in gallery |
| Flipkart | 1, 2, 4, 3, 10 | Clear front, back and side views reduce size doubts |
| Own website | All 12 | Use lifestyle frames on category banners and ads |
What Are the Most Common Menswear Model Shoot Mistakes?
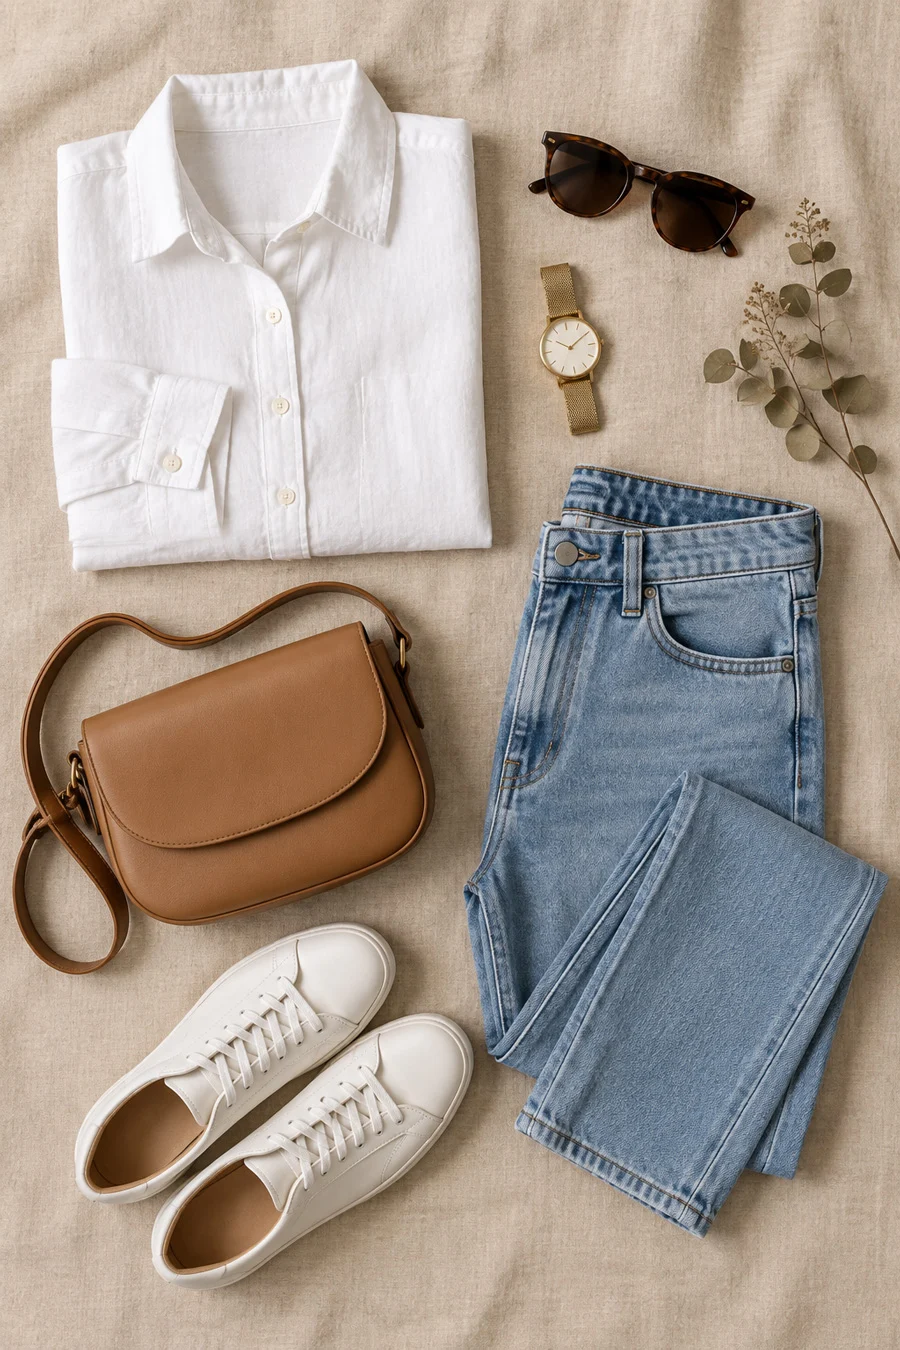
The most common mistakes are wrong sample sizes, shooting from eye level, skipping the back view, and styling that hides the product. Each one makes fit harder to read, and unclear fit is what drives menswear returns.
- Sample does not fit the model: clips on the back create pulls that show in the side profile.
- Inconsistent camera height: trousers look different lengths from one SKU to the next.
- No back view for denim and kurtas: buyers cannot judge seat fit or back detailing.
- Over-styling: jackets, scarves and bags covering the garment you are actually selling.
- Too many editorial poses: dramatic angles look great on social media but confuse a size decision.
- Colour drift: no grey card, so navy turns black and olive turns brown after editing.
“A menswear catalogue is judged in the grid, not one image at a time. If every style is shot with the same frames, the same height and the same light, the whole brand looks premium.”Satyam, Founder, Uniqs Studio
Should You Use Real Male Models or AI-Generated Models?
Use real male models for the catalogue images buyers rely on to choose size. AI-generated models can be useful for quick concept mock-ups, but they often reshape collars, shorten sleeves or change the drape, and that gap between the image and the product leads to returns.
We see more brands experimenting with AI try-on tools in 2026, and the appeal is easy to understand. The problem is fit accuracy: an AI model wears a garment the software imagined, not the one you manufactured. For shirts and denim, where a centimetre of sleeve or rise changes the buying decision, a real model in your actual sample is still the safest choice. Google also advises using original, high-quality images in its image SEO best practices, which real photography naturally meets.
How Much Does a Menswear Model Shoot Cost?
At Uniqs Studio, model photography is priced per product, with 5–6 angles per style and a 4–5 day turnaround. Videos, ghost mannequin and flat lay images are priced separately, so you can build the exact mix your catalogue needs.
| Shoot type | Images | Turnaround | Price |
|---|---|---|---|
| Model Photography | 5–6 angles | 4–5 days | ₹400 / product |
| Ghost mannequin | 1 angle | 3–4 days | ₹250 / image |
| Flat lay | 2–3 angles | 6 days | ₹290 / product |
| Footwear | 4–5 angles | 5 days | ₹245 / product |
| Ecommerce Reels Video | 20–25 seconds | 4–5 days | ₹900 / product |
| Garment Video with Model | 25–30 seconds | 4–5 days | ₹1,200 / garment |
Prices are per product/image as listed; call or WhatsApp +91-8076745824 for bulk catalogue quotes.
Share your style count and the frames you need from this list, and the team will plan the shoot day with you. Call +91-8076745824, message us on WhatsApp at +91-8076745824, or email [email protected] with your style sheet.
Printable Menswear Model Shoot Shot List Checklist
Use this checklist on the day of the shoot to tick off each style. If every box is ticked before a garment leaves the set, you will not need a reshoot later.
- Style sheet shared with SKU, colour and required frames
- Garments steamed, lint-rolled, tags removed, sample size matches the model
- Grey card shot for each new colour
- Tripod height and floor mark locked for full-length frames
- Frames 1–4: front, three-quarter, side, back
- Frames 5–8: hand-in-pocket, walk, sleeve or arms, seated or leaning
- Frames 9–12: upper-body crop, fabric macro, trim detail, styled look
- Category swaps done: cuff for shirts, slit for kurtas, back pocket for denim
- Optional 20–30 second garment video captured in the same light
- Brand approval on the tethered laptop before the next style
Which Menswear Shoot Trends Matter in 2026-2027?
The biggest trends are short motion content next to stills, warmer neutral backgrounds for ethnic wear, and more honest fit imagery with model height and size shown. All three help buyers decide faster and return less.
Marketplaces and D2C sites are giving more space to video, so brands increasingly capture a short walk-and-turn clip for every hero style alongside the still frames. Ethnic menswear is moving towards soft beige and warm grey backgrounds instead of pure white, while formal shirts and denim stay on clean white or light grey. And more listings now state “model is 6 ft and wears size M”, a small line of text that makes the menswear model shoot shot list even more valuable, because consistent frames make that information easy to compare.
Menswear Model Shoot FAQs
Quick answers to the questions menswear brands ask us most often before booking a shoot.
Plan 12 frames per style: four core views, four fit and movement poses, and four detail or lifestyle shots. Most marketplaces will use 5 to 7 of them, and the rest serve your website, ads and social media.
A square straight-front pose, a three-quarter turn with a light cuff touch, a chest-up collar crop and a back view work best for formal shirts. For casual shirts, add an untucked hand-in-pocket pose and a sleeve-roll frame.
After the front image, the side profile matters most because it shows kurta length and side slits clearly. A gentle walking step is the next most useful frame for showing fabric fall.
The back view shows seat fit and back-pocket placement, which are key fit signals for jeans. Without it, buyers guess the fit, and guessing leads to returns.
Model photography is ₹400 per product for 5–6 angles with a 4–5 day turnaround. A garment video with model is ₹1,200 per garment, and an ecommerce reels video is ₹900 per product.
AI models are fine for early concepts, but for catalogue images we recommend real models wearing your actual samples. AI tools often change collar shape, sleeve length and drape, which misleads buyers about fit.
Send your style list and we will map every shirt, kurta and pair of jeans to the right frames. Call Satyam on +91-8076745824, WhatsApp +91-8076745824 or write to [email protected]. We shoot in Delhi, Gurgaon, Noida, Faridabad and Ghaziabad, Monday to Saturday, 10 am to 7 pm.
Call +91-8076745824Next Step: Turn Your Shot List into a Booked Shoot
You now have the complete menswear model shoot shot list. The next step is to match it with the right model, studio and team. Our studio at 1800/9, Kalkaji Extension, New Delhi handles casting, styling, shooting and editing under one roof, and you can visit or contact the Uniqs Studio team to fix a date. Call +91-8076745824 to check model availability for your sizes.
Book a male model shoot in Delhi- Menswear Size Chart Photography: How to Show Fit for Shirts and Trousers
- Men’s Ethnic Wear Photography for Wedding Season Catalogues
- T-Shirt and Polo Model Shoot Guide for D2C Brands
- Blazer and Suit Photography: Poses, Lighting and Detail Shots
- How to Brief a Male Model for an Ecommerce Shoot