
Ecommerce Fashion Photography Shot List: 45 Essential Shots by Clothing Category (Shirts, Sarees, Jeans, Kurtis & Dresses)
A production-ready, category-wise reference from Uniqs Studio — used across shirts, sarees, jeans, kurtis and dresses on shoot day.
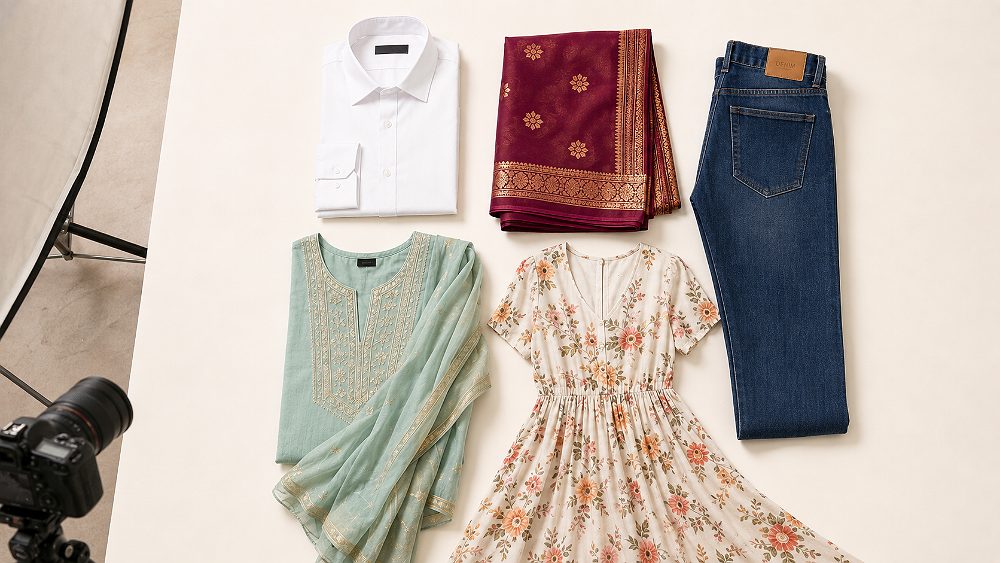
An Ecommerce Fashion Photography Shot List is a pre-shoot document that lists every image required for each garment SKU by angle, shot type and styling note. Most apparel SKUs need 8–10 shots; sarees, kurtis and dresses need 9–12 because of drape, print repeat and detail work.
A complete Ecommerce Fashion Photography Shot List is the difference between a catalogue that ships on time and a re-shoot that costs you two weeks. At Uniqs Studio we photograph hundreds of apparel SKUs every month across shirts, sarees, jeans, kurtis and dresses — and the single most expensive mistake we still see brands make is walking into a shoot with a generic checklist that treats a silk saree the same as a pair of denims. This guide gives you the entire framework we use in-house: nine universal base shots, five category-specific overlays, marketplace image specs for six platforms, a copy-paste apparel product photography shot list template and the exact garment photography for ecommerce workflow that keeps our catalogue turnaround under 48 hours.
Table of Contents
- What Is an Ecommerce Fashion Photography Shot List?
- Why Category-Wise Beats a Generic Checklist
- The Universal Base Shot List (9 Shots)
- Shirt Photography Shot List
- Saree Photography Shot List
- Jeans & Denim Photography Shot List
- Kurti Photography Shot List
- Dress Photography Shot List
- Marketplace Image Requirements
- Build Your Own Shot List Template
- 12 Shot List Mistakes to Avoid
- Planning for 100+ SKUs a Day
- Cost & Packages in Delhi NCR
- Why Brands Choose Uniqs Studio
- FAQs
Key Takeaways
- Every apparel SKU needs the same 9 base shots, then a category-specific overlay on top.
- Sarees, kurtis and dresses require 9–12 shots; shirts and jeans do well with 8–10.
- A written Ecommerce Fashion Photography Shot List cuts re-shoot risk to near zero and speeds shoot days by roughly 25%.
- Marketplace compliance (aspect ratio, background, image count) belongs inside the shot list — not as a separate task.
- Fabric texture, scale reference and colour-calibrated flats are the three shots that most directly reduce apparel returns.
What Is an Ecommerce Fashion Photography Shot List?
An Ecommerce Fashion Photography Shot List is a pre-shoot document that lists every image required for each garment SKU — the angle, the shot type, the styling note, the priority and the delivery status. Think of it as the production script for your catalogue: the creative brief tells the team why the shoot exists, but the shot list tells them exactly what to capture before a single garment is steamed. At Uniqs Studio, the shot list is signed off by the client and the studio production lead the day before the shoot, which is what allows us to move from styling station to camera without a single “wait, did we get that angle?” moment.
A usable shot list has five columns at minimum: SKU code, shot number, shot type, styling note and status. Some catalogue managers add a sixth column for marketplace priority, which is what turns a good list into a compliance-ready one for Amazon India and Flipkart. Our detailed fashion catalogue photography guide walks through the sign-off workflow, and if your setup is more marketplace-heavy the garment photography for online marketplaces playbook layers platform rules on top.
Why Every SKU Needs a Shot List Before the Shoot
The average cost of re-shooting a single apparel SKU in Delhi NCR — model call fees, styling, studio hire, retouching — sits between ₹800 and ₹2,500 depending on category. Multiply that by even 30 SKUs from a missed angle and a weekend re-shoot has just eaten your entire month’s photography budget. The other silent cost is the two-week listing delay while re-shoot rounds happen, which for a seasonal drop is often more painful than the money.
The shot list eliminates this entirely because every angle, every detail macro and every scale reference is decided in a calm meeting, not in the pressure of a live set. Brands running high-SKU catalogues also see the shot list flatten garment photography cost because there is no “studio overtime” line item — everyone knows exactly when the last frame gets shot.
Shot List vs Shoot Brief vs Style Guide
These three documents get confused constantly, and mixing them up is what leaves detail shots unshot. The shoot brief explains why — the campaign purpose, the target audience, the mood. The style guide explains how it must look — the tone, the styling rules, the retouching finish. The Ecommerce Fashion Photography Shot List explains what to capture — a flat, mechanical list your studio can execute without interpretation. You need all three, and if you only have one, make it the shot list.
Why a Category-Wise Ecommerce Fashion Photography Shot List Beats a Generic Checklist
A shirt is judged on collar shape, placket alignment and cuff finish. A saree is judged on pallu drape, border work and blouse-piece coordination. Jeans are judged on rise, waistband detail and wash accuracy. A single generic checklist cannot serve all three — which is why almost every Western-authored shot list on the internet fails Indian apparel brands the moment sarees or kurti sets enter the SKU list. This is the exact problem a category-wise Ecommerce Fashion Photography Shot List solves: nine universal base shots stay constant, and the detail shots swap out entirely per garment type.
The evidence for this is behavioural. When we run heatmap tests on our clients’ PDPs, shoppers on saree listings pinch-zoom into the pallu and border within the first six seconds. Shoppers on denim pinch-zoom into the wash and hem. That behavioural difference is why our fashion photography for ecommerce workflow builds the shot list category-first, and why our internal clothing photography reviews always ask “what would the shopper zoom into?” before we sign off any list.
What Shoppers Zoom Into by Garment Type
The zoom map for apparel is remarkably consistent across categories. Shirts get zoomed at the collar and cuff. Sarees at the pallu, border and blouse piece. Jeans at the waistband, wash and hem. Kurtis at the print repeat, neckline and dupatta pairing. Dresses at the neckline, waist detail and hemline. These are the five detail shots your Ecommerce Fashion Photography Shot List must overlay on top of the nine base shots, without exception.
This is also why our flat lay photography workflow always allocates two dedicated frames to the zoom-magnet detail per category — those are the frames that convert browsers into buyers on clothing product image counts.
The Shots That Actually Reduce Apparel Return Rates
India’s online apparel return rate hovers between 25% and 40%, and roughly two-thirds of those returns cite the same three reasons: size doesn’t fit, colour looks different, fabric feels different. Every one of those three has a corrective shot: a scale reference with declared model height and size worn addresses fit; a colour-calibrated flat with a grey-card reference addresses colour; a fabric texture macro addresses feel. Skipping any of these three is why the same brand can shoot beautifully and still see 35% returns.
The shot list is where you enforce this — every SKU row gets those three shots marked “Critical,” not optional. Our post on clothing product photography mistakes unpacks why studios routinely skip the fabric macro and how much it costs their clients.
The Universal Base Shot List: 9 Shots Every Garment SKU Needs
This is the framework we run on every apparel shoot at Uniqs Studio, regardless of category. Nine shots, in this order, on every SKU. Once these are in the bag, the category-specific overlay begins. If you take nothing else from this guide, take these nine — they are the backbone of any credible Ecommerce Fashion Photography Shot List.
Front Full Shot
The hero image. Straight-on, full garment in frame, seamless white or brand backdrop, feet-to-neckline (or feet-to-head on model).
Back Full Shot
Same framing as the front. Shows construction — yoke, back darts, seat, hem line — the details customers can’t guess from the front.
Side Profile
90-degree side view. Communicates silhouette, drape and how the outfit sits on the body — critical for structured attire and dresses.
45-Degree Three-Quarter
The most flattering angle for apparel — reads dimension, fit and finish in one frame. Used as a secondary hero on many marketplaces.
Fabric Texture Macro
Extreme close-up of the fabric weave, print or embroidery. The shot that answers “what does this fabric actually feel like?”
Trim & Hardware Detail
Buttons, zips, rivets, hooks, embroidery hardware. Shows quality of finish and separates premium clothes from budget threads.
Label & Care Tag
The brand label, wash-care tag and any authenticity marker. Builds trust and reduces “is this original?” pre-purchase queries.
Flat Lay or Ghost Mannequin
Either a styled flat lay or an invisible-mannequin frame. Both work; pick one per category and stay consistent across the SKU.
Scale & Fit Reference
A full-body model frame with the model’s height and the size worn declared in the caption. The single most powerful return-reducer.
Core Angles: Front, Back, Side and 45-Degree
The first four shots are non-negotiable and interchangeable across categories. What varies is how they are captured — on model, on ghost mannequin, or as a flat lay. Structured attire (shirts, jackets, denim) usually needs a mix of on-model and ghost mannequin so that construction reads cleanly. Draped garments (sarees, dupattas) require on-model or a full-drape mannequin — a flat lay of a saree simply cannot communicate fall. Our fashion photography studio vs outdoor shoot comparison covers when each setup earns its place.
Detail, Fabric and Scale Shots
Shots 5 through 9 are the ones brands skip most often — and lose the most sales on. The fabric macro is the visual proxy for touch; the trim detail is the visual proxy for quality; the scale reference is the visual proxy for fit. Skip any one and you have handed the shopper a reason to return the parcel. Our internal garment preparation checklist forces the styling team to prep every SKU specifically so these detail shots can be captured cleanly, without last-minute steaming interruptions.
Shirt Photography Shot List (Formal, Casual & Oversized)
Shirts are the highest-volume garment category on Indian ecommerce and, ironically, the one with the most inconsistent shot lists. The reason: brands treat all shirts the same, when in reality a formal shirt is judged on placket precision, a casual shirt on styling and a boxy oversized shirt on drape. The correct Ecommerce Fashion Photography Shot List for a shirt SKU sits at 8–10 frames and always includes a placket-and-collar detail at eye-level height, not from above.
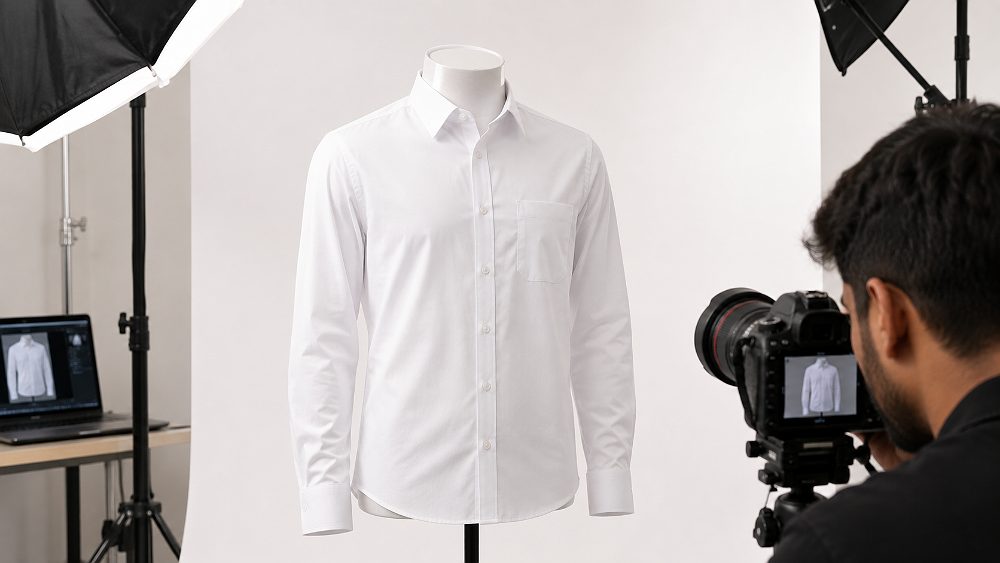
Ghost mannequin shirt setup at Uniqs Studio — collar structure and placket alignment are the two zoom-magnets.
Must-Have Shirt Angles and Detail Shots
- Front full — flat, ghost mannequin or on-model
- Back full — same setup as front for consistency
- Side profile — reads fit through the torso
- Collar and placket macro — eye-level, showing button spacing and stitch quality
- Cuff detail — buttoned and unbuttoned frames for formal, rolled sleeve for casual
- Fabric weave macro — reveals cotton, linen, poplin or blend
- Yoke and shoulder seam detail
- Brand label and size tag
- Scale reference on model with height declared
- Optional lifestyle frame for casual and oversized threads
Styling, Steaming and Placket Alignment Rules
Every shirt on set gets steamed twice — once during garment prep and once again just before the placket-alignment frame is shot. The placket must be vertically centred with even button gaps, the collar stand must be uniform on both sides, and the yoke must sit flat with no wrinkle across the shoulder line. Our team uses fine dressmaker pins hidden inside the sleeve to hold the shape on ghost mannequin setups.
Saree Photography Shot List (Drape, Pallu, Border & Blouse)
Sarees are the highest-value untapped semantic field in Indian ecommerce fashion photography — and the category that most obviously breaks a generic Ecommerce Fashion Photography Shot List. A saree is not one garment; it is a length of fabric, a border, a pallu, an unstitched blouse piece and a way it must fall. The correct shot count for a saree SKU sits between 9 and 12, and skipping the pallu spread frame is arguably the single most common mistake we see on Indian ethnic wear catalogues.
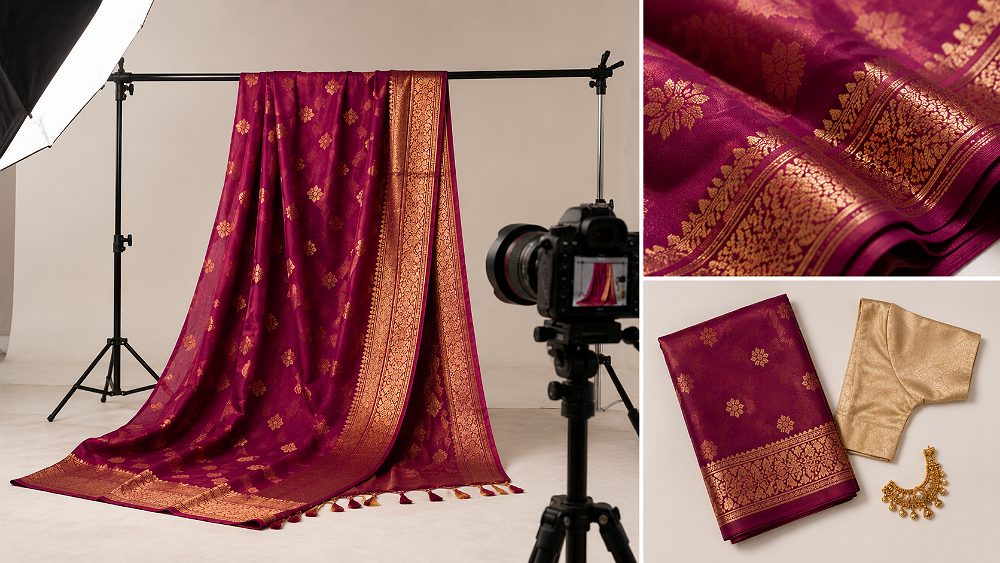
Draped saree with pallu spread and zari border macro — the two frames that most influence saree conversions.
How to Shoot the Pallu, Border and Zari Work
- Full draped saree on model — front, three-quarter and back
- Pallu spread flat — full motif visible
- Border macro — showing zari, weave or embroidery detail
- Body fabric macro — texture and weave close-up
- Unstitched fabric layout — length declared
- Blouse piece flat — separate frame, colour-matched
- Drape close-up — showing fall from waist to floor
- Back drape — pleats and pallu attachment
- Colour-true swatch frame under 5500K lighting
- Scale reference — model height and saree length declared
A serious fashion photography for clothing brands workflow allocates 15–20 minutes per saree SKU because of drape adjustment, and never re-uses drape between colours of the same design.
Draped Model vs Mannequin vs Flat Lay for Sarees
The honest answer: sarees need at least one draped-model frame. Mannequin drape works for structural reference, and flat lay works for fabric and border detail, but the sale is made on the draped frame because that is the only frame that answers “how will this saree actually fall on me?” Brands that ship saree catalogues without a single draped frame consistently see higher return rates than category peers.
Jeans & Denim Photography Shot List (Fit, Rise & Wash)
Denim is the highest-return apparel sub-category in India — roughly 35–45% of all denim orders are returned, and “fit didn’t match photo” is the reason cited more than any other. The Ecommerce Fashion Photography Shot List for a pair of jeans has to fight this specifically. That means the waistband, rise and inseam must be shot flat with measurements visible, and the wash detail must be shot under colour-calibrated lighting so indigo reads true.
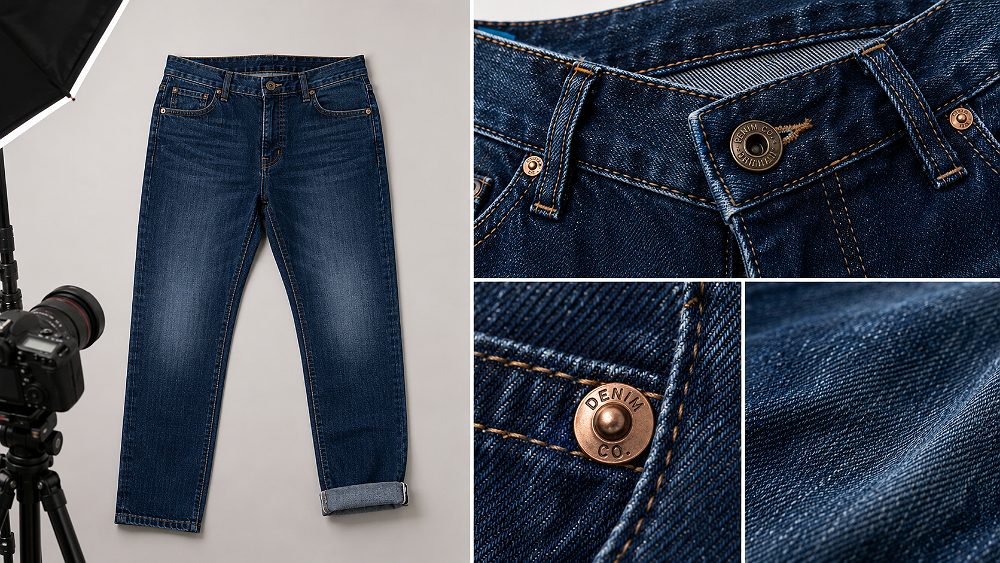
Denim detail composite — waistband, rivet and wash close-ups are what separate a denim listing that converts from one that returns.
Denim Detail Shots That Reduce Size Returns
- Front full — on model, feet visible
- Back full — pocket detail included
- Side profile — silhouette and rise
- Waistband detail — button, buttonhole, belt loops
- Back pocket macro — stitching, arcuates, tag
- Rivet and hardware macro
- Wash and fade close-up — thigh and knee
- Hem and cuff detail — raw, selvedge or cuffed
- Seated or crouch frame — stretch demonstration
- Scale reference — model height, waist size worn, inseam
Capturing Wash, Fade and Stretch Accurately
Every denim SKU on our set gets a grey-card white-balance reference before the first frame, and every wash frame is shot tethered so retouching can match the on-set reading exactly. This is the difference between a mid-wash denim that reads correctly on-screen and one that arrives at the customer’s door looking two shades darker than the photo. Our garment photography editing workflow covers this colour-matching chain end to end.
Kurti Photography Shot List (Length, Print & Occasion)
Kurtis are where multi-piece SKU handling begins to matter. A single kurti SKU may be sold standalone, or as a set with palazzo and dupatta, or as a three-piece with pant. Each variant needs its own Ecommerce Fashion Photography Shot List — and the biggest mistake we see is brands using the same shot list for a standalone kurti and a set, then wondering why the set listings underperform.
Kurti Sets: Shooting Kurti, Pant and Dupatta Together
- Full-set front on model — kurti, pant and dupatta styled
- Full-set back on model
- Kurti standalone front and back
- Dupatta drape — three styling variants
- Pant or palazzo standalone — waistband detail included
- Print repeat macro — kurti body
- Neckline and yoke detail
- Sleeve and hem detail
- Fabric weave macro
- Full-set flat lay — all three pieces laid out
- Scale reference on model
Our model photographer team allocates a full dupatta-styling pass mid-shoot for every kurti-set SKU, and the styling variants are captured back-to-back so that shoppers can visualise different draping options in a single scroll.
Dress Photography Shot List (Silhouette, Fall & Movement)
Dresses are the category where movement matters most. A satin midi that hangs beautifully but does not flow will underperform against a rayon midi with a movement frame — even if the satin is objectively the better garment. This is why the Ecommerce Fashion Photography Shot List for a dress SKU always includes at least one movement or twirl frame, ideally a short-form video as well.
Movement, Twirl and Short-Form Video Shots for Dresses
The dress-specific overlay adds a movement frame captured mid-twirl, a seated frame showing how the dress behaves when the wearer sits, and a walking frame that captures fall from behind. For premium SKUs we also shoot a 6–10 second vertical video that many brands use on Instagram Reels and Myntra Studio. The ecommerce video production team handles this as a parallel workflow so it doesn’t slow down the still shoot.
Marketplace Image Requirements: Amazon, Flipkart, Myntra, Meesho, Ajio & Nykaa Fashion
The last column of your Ecommerce Fashion Photography Shot List is marketplace compliance. Every platform enforces its own aspect ratio, background rule and minimum image count, and getting these wrong is the fastest way to have a listing bounced back after upload. The table below is a working reference; verify against the live seller portals before every catalogue upload because guidelines shift quietly.
| Platform | Min Resolution | Aspect Ratio | Background | Images Allowed | Model Required |
|---|---|---|---|---|---|
| Amazon India | 1600 px longest side | 1:1 (square) | Pure white (RGB 255) | Up to 9 per listing | Optional |
| Flipkart | 2000 px longest side | 1:1 | Plain white or light neutral | Up to 8 per listing | Recommended for apparel |
| Myntra | 2400 × 3200 px | 3:4 (portrait) | Studio grey to soft white | 4–6 per style | Yes — on-model mandatory |
| Meesho | 1200 px longest side | 1:1 or 3:4 | White or subtle prop backdrop | Up to 7 per catalogue | Optional |
| Ajio | 2000 × 2668 px | 3:4 | Neutral studio | 4–6 per style | Yes — on-model preferred |
| Nykaa Fashion | 2000 px longest side | 3:4 | Clean neutral | 4–6 per style | Yes — on-model preferred |
Last verified: August 2026. Always cross-check against the current Amazon India seller image guidelines and Flipkart Seller Hub policies before upload.
Image Count, Ratio and Background Rules by Platform
Amazon India accepts a square hero at 1600 pixels minimum on pure white; Flipkart accepts the same 1:1 ratio but pushes for 2000 pixels; Myntra and Ajio both demand 3:4 portrait on-model frames and reject flat-only catalogues. Meesho is the most flexible on ratio but the strictest on prop clutter. Building these rules directly into the shot list means your studio delivers marketplace-ready folders on day one, not after a rejection round.
How to Build Your Own Ecommerce Fashion Photography Shot List Template
Building your own Ecommerce Fashion Photography Shot List template takes about thirty minutes and pays back on every subsequent shoot. The structure is a spreadsheet — Google Sheets or Excel — with one row per SKU and one column per shot type. Below is the five-step method we use at Uniqs Studio to build a fresh shot list for a new brand client.
- List every SKU by category. Export your SKU master and group items by garment type — shirts, sarees, jeans, kurtis, dresses. Category grouping is the foundation of any usable shot list.
- Apply the 9 base shots. Add columns for the universal front, back, side, 45-degree, fabric macro, trim detail, label, flat/ghost and scale reference frames.
- Add the category-specific overlay. Layer the category detail columns — pallu and zari for sarees, collar and cuff for shirts, waistband and wash for jeans, dupatta drape for kurti sets, hemline and fall for dresses.
- Map marketplace specs. Add a column per marketplace with the required aspect ratio, background rule and image count per style.
- Assign priority and status. Mark every row Critical, High or Optional and add a status column your studio updates live during the shoot for on-set QC.
The 8 Columns Every Ecommerce Fashion Photography Shot List Must Have
The strongest shot list templates share eight columns: SKU code, category, shot number, shot type, angle, styling note, priority and status. This structure survives every catalogue size we have shot — from 20 SKUs for a boutique launch to 2,000 SKUs for a marketplace aggregator.
| SKU Code | Category | Shot # | Shot Type | Angle | Styling Note | Priority | Status |
|---|---|---|---|---|---|---|---|
| SH-1024 | Shirt (Formal) | 01 | Front full | Straight-on | Placket centred, all buttons closed | Critical | — |
| SH-1024 | Shirt (Formal) | 05 | Collar & placket macro | Eye-level | Steamed twice, no cuff visible | Critical | — |
| SR-2087 | Saree (Silk) | 07 | Pallu spread | Overhead flat | Full motif visible, ivory backdrop | Critical | — |
File Naming Convention and Delivery Folder Structure
File naming is where most catalogues quietly break. Our convention is BRAND_SKU_CATEGORY_SHOTTYPE_01.jpg — for example, LUNAR_SH1024_SHIRT_FRONT_01.jpg. Delivery folders follow /ClientName/ShootDate/Category/SKU/. This convention lets a catalogue team of any size upload without ever asking “which file is which?” It also plays well with automated image SEO workflows — our garment image SEO guide covers the alt-text and filename layer for organic search visibility.
12 Shot List Mistakes That Quietly Kill Conversions
- No fabric texture macro. The shopper never gets to “feel” the material.
- Inconsistent white balance across the SKU. Colours read differently in the same listing.
- Unsteamed clothes on set. Wrinkles read as “cheap” no matter the actual quality.
- Model height not disclosed. Scale becomes guesswork.
- Missing back shot. Construction stays hidden; returns spike.
- No scale reference frame. The single biggest driver of fit-related returns.
- Over-retouched colour. A saree that arrives duller than the photo becomes a return, every time.
- Ignoring platform ratio. Listings bounce back at upload and re-crop introduces errors.
- No dupatta styling frame on kurti sets.
- No wash close-up on denim. Indigo is the least trusted colour online.
- Shooting untethered. No live QC, no early error detection.
- Skipping the on-set QC pass per SKU before wrap.
Planning an Ecommerce Fashion Photography Shot List for 100+ SKUs a Day
Scaling the Ecommerce Fashion Photography Shot List to bulk catalogue days changes the operational shape but not the framework. On a 100+ SKU day we run two parallel setups — one for structured attire (shirts, denim) on ghost mannequin, one for draped outfits (sarees, kurtis, dresses) on model. Shots are batched by category and then by colour within category, which cuts lighting-reset time by roughly 25%. Every SKU gets tethered capture and live on-monitor QC before it leaves the styling station.
Shoot Flow, Batching and On-Set QC Checklist
- Pre-shoot: full SKU list signed off, all attire tagged and steamed
- Batch by category, then by colour within category
- Two setups minimum: ghost mannequin + on-model
- Tethered capture, live monitor QC on every SKU
- File naming applied at capture, not in post
- Per-SKU sign-off before it leaves the set
- End-of-day folder handoff to retouching with priority tags intact
Ecommerce Fashion Photography Cost & Packages in Delhi NCR
Fashion photography pricing in Delhi NCR varies by category, method and turnaround. The tiers below reflect our current 2026 rate card at Uniqs Studio for catalogue-scale shoots. Per-SKU pricing is standard for volumes above 25 items; day-rate packages become more efficient beyond 60 SKUs a day. For a category-wise breakdown of what changes the rate, our fashion photography cost in Delhi guide has the full mechanics.
Basic
₹199 – ₹349 per SKU
5–6 shots per SKU
- Flat lay or mannequin
- Front, back, side, detail, fabric
- Basic colour correction
- 48–72 hr delivery
Standard
₹399 – ₹699 per SKU
8–10 shots per SKU
- Ghost mannequin + flat
- Full 9-shot base list
- Colour-calibrated workflow
- Marketplace spec delivery for 3 platforms
- 48 hr delivery
Premium
₹899 – ₹1,499 per SKU
10–12 shots per SKU
- Professional model + HMU
- Category-specific shot list
- Movement + 3 lifestyle frames
- All-platform spec delivery
- 1 short-form video
Enterprise
From ₹1,50,000 per cycle
Fully customised
- 500+ SKU catalogue production
- Dedicated production manager
- Multi-model days, tethered QC
- 24-hr priority turnaround
- Dedicated cloud delivery portal
Prices are indicative; final quote depends on SKU count, category mix and turnaround. WhatsApp Satyam on +91-8076745824 for a category-wise quote against your SKU list.
Why Fashion Brands Choose Uniqs Studio for Category-Wise Catalogue Shoots
Uniqs Studio is a Delhi NCR-based fashion and product photography studio led by Satyam, with more than nine years of experience shooting apparel, jewellery and lifestyle catalogues for Indian D2C brands and marketplace sellers. Our category-wise Ecommerce Fashion Photography Shot List is a standard deliverable — it is signed off before every shoot, executed on set with tethered live QC, and delivered as marketplace-ready folders for Amazon India, Flipkart, Myntra and adjacent platforms. We service brands across Delhi, Gurgaon, Noida, Faridabad and Ghaziabad, with same-week turnaround as the default.
For a quick consult, call Satyam on +91-8076745824 or email [email protected] — we’ll turn your SKU list into a working shot list within 24 hours.
Frequently Asked Questions About Ecommerce Fashion Photography Shot Lists
How many photos do I need per clothing SKU for ecommerce?
Most apparel SKUs need 8 to 10 images: front, back, side, 45-degree, fabric macro, trim detail, label, flat lay or ghost mannequin, and a scale reference. Sarees, kurtis and dresses usually need 9 to 12 because of drape, print repeat and detail work.
What is the difference between a shot list and a shoot brief?
A shot list specifies exactly which images to capture for each SKU — angle, shot type and styling note. A shoot brief explains the purpose, audience and mood of the shoot. The brief guides creative direction; the shot list guides production execution.
Which shots reduce apparel return rates the most?
Three shots matter most: a fabric texture macro that shows the true weave, a scale reference showing the garment on a model with stated height and size, and a colour-calibrated flat. Together they address fit, fabric and colour — the top three return reasons in online apparel.
Do sarees need a different shot list than shirts or jeans?
Yes. Sarees need pallu spread, border and zari macros, drape and fall shots, plus a separate blouse-piece frame. Shirts need collar, cuff and placket details; jeans need waistband, rise and wash close-ups. The nine base shots stay constant; the detail shots change entirely by category.
How long does it take to shoot one apparel SKU?
A flat lay or ghost mannequin SKU takes 8 to 10 minutes with a prepared shot list. On-model sarees, kurtis and dresses take 12 to 20 minutes including styling and drape adjustment. A well-batched studio day covers 60 to 120 SKUs depending on category and setup count.
Turn this shot list into a shoot plan.
Uniqs Studio shoots category-wise apparel catalogues across Delhi NCR, Gurgaon, Noida and Faridabad — marketplace-ready on delivery.