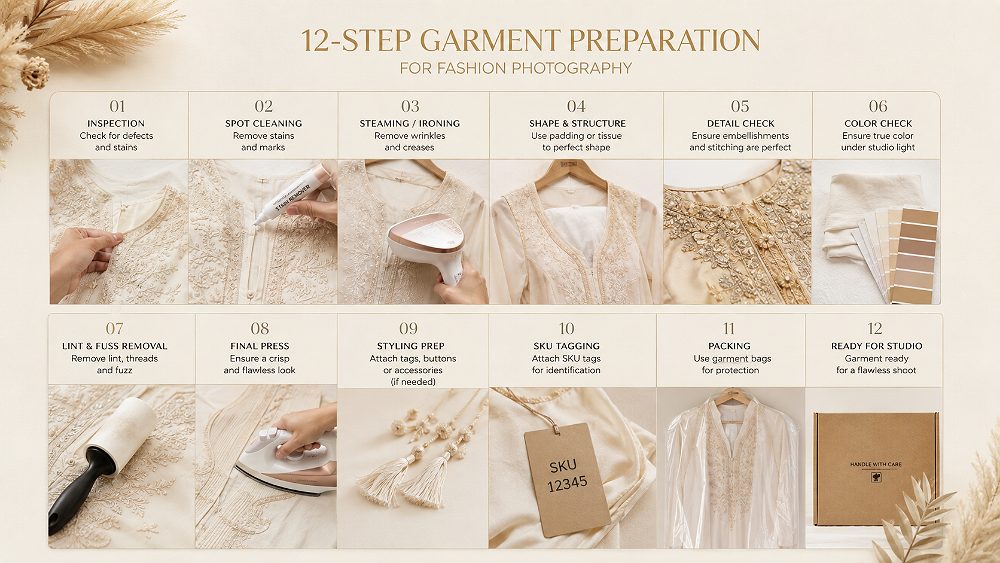
Garment Preparation for Fashion Photography: 12 Essential Steps Before Studio Day
A studio-tested pre-shoot checklist for clothing brands, D2C labels, apparel manufacturers and catalogue teams — written from the floor of our Delhi NCR studio.
Three cartons arrive at the studio. The tape peels back, and inside is a womenswear catalogue: sixty pieces, most of them creased flat from transit, half still carrying MRP tags, one with a chalk mark down the placket, and no SKU sheet anywhere in the box. That is the moment where a shoot day quietly loses four hours — before a single frame is captured. Garment preparation for fashion photography is where image quality, budget and go-live speed are actually decided, and it is a brand-side responsibility that most clothing labels underestimate.
This guide is the twelve-step pre-shoot system we use at Uniqs Studio — inspection, steaming, tag removal, styling prep, SKU tracking and packing — written specifically for Indian clothing brands, D2C labels and manufacturers shooting for marketplaces and their own catalogue photography programmes.
Garment preparation for fashion photography is the pre-production process of inspecting, steaming, de-threading, de-tagging, style-prepping and SKU-labelling apparel samples so they are camera-ready on arrival. Send samples 48–72 hours before the shoot with a printed manifest.
Key Takeaways
- Pre-shoot prep decides more of your final image quality than lighting or lens choice.
- Steaming is safer than ironing for most fabrics; fabric-wise rules matter for Indian textiles.
- Remove MRP, barcode and security tags — keep brand and care labels tucked, not cut.
- An SKU manifest is the single fastest way to prevent studio chaos and file-naming rework.
- A brand-side prep SOP typically pays for itself the first time it prevents a partial reshoot.
What Is Garment Preparation for Fashion Photography?
Garment preparation for fashion photography is the pre-production process of inspecting, cleaning, steaming, styling and SKU-documenting apparel samples so they are camera-ready before they reach the studio. It sits between your sampling department and the shoot floor, and it applies whether you are shooting ghost mannequin silhouettes, flat lay compositions, on-figure model imagery or a full lookbook.
Prep is often confused with styling, but they are two different disciplines. Prep is what your production or merchandising team owns — the clothing has to arrive clean, correctly sized, tagged with its SKU and free of retouch-inflating flaws. Styling is what happens on set: pinning for fit, tucking, layering and finishing. Treat them separately and you will stop paying studio rates to fix warehouse-side problems on high-value garment photography shoot days.
Why Garment Preparation Decides the Quality of Every Frame
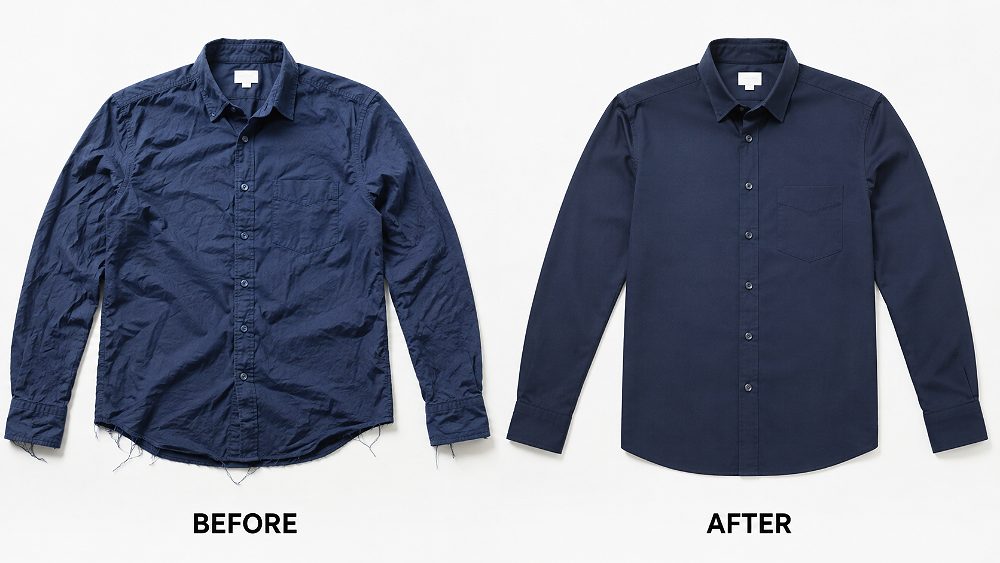
Continuous studio lighting is unforgiving. A crease that looks fine in daylight can read three times harsher under strip softboxes and beauty dishes, and once fabric texture is destroyed by a set-in fold, no amount of retouching fully rebuilds it. Every wrinkle, thread and sticker residue you send into the studio converts directly into post-production hours — and post-production hours are what quietly break apparel photography budgets.
The other cost is time-to-listing. When samples arrive under-prepared, shoots slip, retouching rounds multiply, and marketplace go-live dates on Myntra, Amazon India and Ajio push out by days. There is also a return-rate signal: inaccurate or messy product imagery drives higher return rates, and returns eat margin faster than any prep line item you might be avoiding. Founders who compare their spend on garment photography against the cost of reshoots quickly see why prep is a leverage point, not a chore.
There is a small operational fact behind all of this: samples that arrive shoot-ready let the studio focus on photography, not laundry. That is the shift a real prep SOP unlocks — and it is why most professional catalogue teams treat clothing sample preparation as a first-class deliverable, not a warehouse afterthought. Brands that treat it seriously see cleaner images, fewer common apparel listing mistakes, and materially lower retouch invoices over a year of catalogues.
Planning a catalogue shoot this month? See how our apparel photography pipeline handles pre-production — or WhatsApp +91-8076745824 with your SKU count.
Step 1–3: The Pre-Shoot Sample Inspection Checklist
QC is the first discipline of clothing sample preparation. Build a fixed inspection station in your warehouse or sampling room, use a daylight-balanced bulb, and log every defect against the SKU before the piece is even folded for the studio. This is where reshoots quietly get prevented — not on set.
Checking Size, Fit and Sample Accuracy
The sample you send to the studio must be a production piece, not a superseded fit sample. For model shoots, send the size that fits your booked model — usually the mid-size of the size set. For ghost mannequin work, send the mannequin-fit size; oversized samples collapse the silhouette and no editing recovers it. Confirm the sample matches your tech pack colour, trim and stitching, and check symmetry on the collar, cuffs, hemline and placket alignment.
Most brands also under-plan for backup pieces. Any high-value or single-piece SKU deserves a second sample in the same carton — because a stain or damage discovered on shoot day, with no backup, is a guaranteed listing delay. A short pre-brief with your model photography partner about model measurements avoids most fit surprises.
Spotting Stains, Marks and Fabric Damage Early
Common culprits inside sampling cartons are chalk marks from pattern rooms, machine oil, deodorant, transit rub marks and pinholes. Test any spot-cleaning attempt on an inside seam first, and never spot-clean on the shoot day itself — solvent marks and water rings appear under studio lights within minutes and will force a reshoot of that SKU.
The cost mathematics are simple: a retouch to remove a stain on a dark garment usually costs three to five times more than the sample itself. If a piece has a visible flaw and no backup, replace it before it ships, not after. This is one of the highest-leverage habits in the entire post-production workflow — because prevented retouches never appear on the invoice.
Removing Loose Threads, Lint and Pilling
Loose threads are the single most common avoidable retouch on ecommerce imagery. A ten-minute pass with small sharp scissors, a lint roller and a fabric shaver eliminates most of them. Dark fabrics show lint the worst, and light fabrics show shadow threads under directional key light — check both under strong lighting before packing.
De-thread after steaming, not before. Steam relaxes fibres and often surfaces new stray threads that were hidden inside the folds during transit. This tiny sequencing change alone materially reduces retouching rounds for our repeat clients producing ecommerce catalogue imagery.
Sample Inspection Checklist
- Confirm sample = production piece, not fit sample
- Match tech pack: colour, trims, stitch lines, symmetry
- Inspect under daylight-balanced bulb, front and back
- Flag stains, chalk marks, oil, deodorant, pinholes
- Send a backup piece for every high-value SKU
- Clip loose threads with small sharp scissors
- Lint roll dark fabrics; fabric-shave any pilling
- De-thread AFTER steaming, not before
Step 4–5: Garment Steaming and Wrinkle Removal Done Right
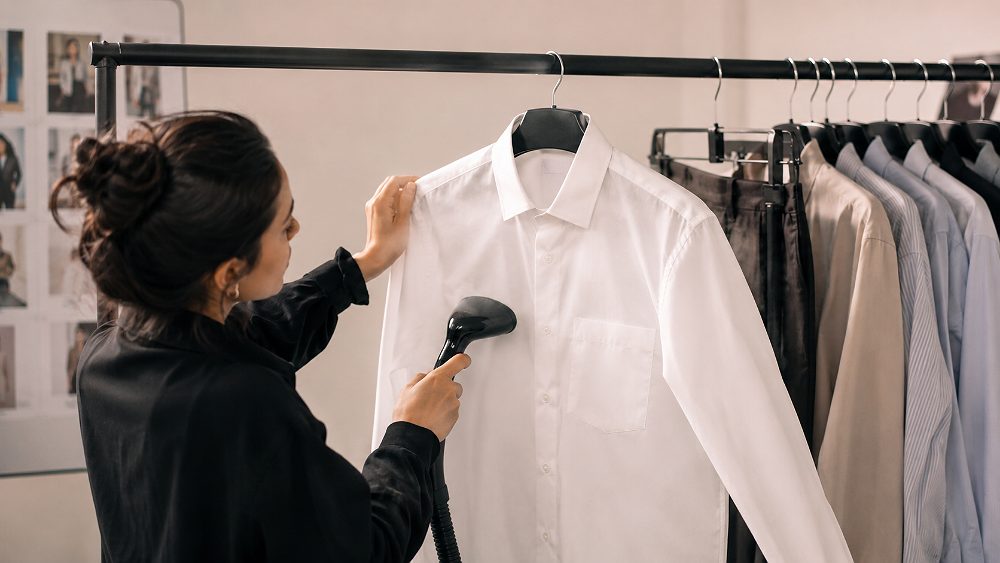
Steaming is the highest-search-volume sub-question inside garment prep, and it is also where the most avoidable damage happens. The rule of thumb: steam most fabrics, iron only crisp cottons and linens, and never touch a hot plate to prints, embellishment or synthetic pile. Get this one block right and your studio hours drop noticeably.
Steamer vs Iron: What to Use on Which Fabric
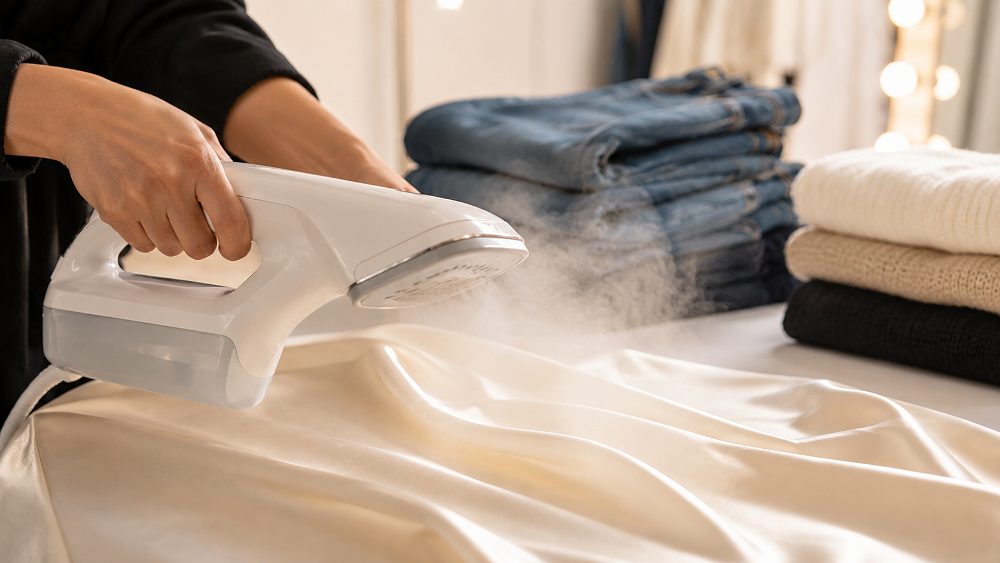
A handheld garment steamer is the safer default for structure-sensitive, pile and delicate fabrics. It relaxes creases without flattening texture and without creating the tell-tale shine an iron leaves on synthetics. Use an iron only where you genuinely need a crisp fold or hem edge — usually cotton shirts, linen kurtas and structured menswear — and always work through a pressing cloth on darks and synthetics.
Never press directly over sequins, zari, hotfix stones, prints or velvet. For anything with surface embellishment, steam gently from the reverse of the garment. This one habit is the single biggest reason our repeat clients in fashion photography stop losing embellished pieces to preventable prep damage.
| Fabric | Recommended Method | Heat / Distance | Caution |
|---|---|---|---|
| Cotton | Steam or iron | High heat, direct | Iron slightly damp for crisp lines |
| Linen | Iron (pressing cloth) | High heat, direct | Linen shows shine easily on darks |
| Denim | Steam | Medium heat, 5 cm | Avoid over-steaming waistband stitching |
| Rayon / Viscose | Steam | Low heat, 8 cm | Water-spots easily — keep the nozzle back |
| Georgette / Chiffon | Steam | Low heat, 10 cm | Never contact — clings and marks |
| Silk | Steam (reverse) | Low heat, 10 cm | Water rings show under studio lights |
| Chanderi | Steam (reverse) | Low heat, 10 cm | Zari borders — avoid direct contact |
| Velvet / Pile | Steam from reverse | Medium, 8 cm | Never press — flattens the pile permanently |
| Knit Jersey | Steam without stretching | Medium, 6 cm | Let cool on the hanger before moving |
| Zari / Embroidered | Steam from reverse only | Low, 12 cm | Direct heat melts sequins and stones |
Fabric-Wise Steaming Guide for Indian Apparel
Indian apparel throws a wider fabric range at prep teams than most Western catalogues do — cotton, linen, denim, rayon, georgette, chiffon, chanderi, silk, velvet, knit jersey and heavily embellished ethnic wear all in the same shoot. The rules shift for each, and a single wrong setting can ruin a piece. Knits are the sneakiest: steam them without stretching, let them cool on the hanger, and only then move them, or the garment will show hanger-mark shoulders under studio light.
Give every steamed piece 15–20 minutes of drying time on a hanger before it goes on a mannequin or model. Damp fabric reads dull, clings unnaturally and picks up new creases the second it is handled. This is doubly important for delicate lingerie and loungewear prep, where visible moisture on the fabric collapses the entire silhouette.
Steaming Mistakes That Show Up Under Studio Lights
Four steaming mistakes show up on nearly every shoot that lands under-prepped: water spotting on silks and rayons from a nozzle too close, glaze marks from a hot iron plate on synthetics, damp fabric that arrives dull and clinging because it was steamed just before packing, and re-creased garments that were folded flat into cartons the moment they came off the steamer.
Simple fixes: keep the steamer nozzle 8–12 cm away for delicates, always use a pressing cloth on darks and synthetics, steam a full day before dispatch, and transport steamed pieces on hangers inside garment bags — not folded. Every one of these habits sits on the brand side, not the studio side, and it is why we always say garment preparation for fashion photography is a warehouse discipline first.
Step 6: Tags, Labels, Stickers and Packaging Removal
Tags and stickers are the confusion point that costs the most on shoot day. Remove MRP and price tags, remove barcode stickers, remove size stickers, and remove security tags — all of them appear in frame, distort the drape, or leave sticky residue that shows on dark clothes under strong light. What you must not do is cut brand or care labels off a saleable sample: pin, tuck or tape them out of view instead, so the piece stays sellable after the shoot.
There is also a photograph-the-tag exception. If the marketplace listing needs a care or composition image, shoot the label as a separate detail frame — do not leave the tag hanging on the main hero shot to save a step. Sticker adhesive residue is another quiet retouch cost: on dark cotton it is visible under a beauty dish, and no fabric-safe remover is instant. Peel stickers gently, and always test a hidden corner first.
| Item | Remove Before Shoot? | Reason | Marketplace Note |
|---|---|---|---|
| MRP / price tag | Yes | Visible in frame, inflates retouch cost | Rejected on Myntra hero shots |
| Barcode sticker | Yes | Adhesive residue on darks | Not allowed on primary imagery |
| Security tag | Yes | Distorts drape and silhouette | Rejected on all catalogue images |
| Size sticker | Yes | Sticker mark under studio lights | Not allowed on lifestyle frames |
| Brand neck label | Keep (tucked) | Sample must stay saleable | Ghost mannequin: keep flat & centred |
| Care / composition label | Keep (tucked) | Legal requirement on garment | Shoot separately if listing needs it |
| Poly bag / packaging | Remove 24 hrs early | Static creases and marks | Static creates lint attraction |
| Hanger clips (plastic) | Remove for shoot | Leaves shoulder dimples | Use padded hangers instead |
What to Remove and What Must Stay Visible
Marketplace nuance matters here. Amazon India, Flipkart and Ajio each have slightly different rules on brand-label visibility, and category-specific bans exist on watermarking, price stickers and promotional badges on primary images. The safe default: strip everything decorative and promotional, keep the mandatory garment labels tucked, and always keep the neck label facing correct for ghost mannequin inner-back composites. When in doubt, check the platform’s seller guideline pages — our marketplace photography guide covers the exact rules for the big Indian platforms.
Step 7–8: Apparel Styling Preparation — Shape, Padding and Pinning
Once the outfits are steamed and de-tagged, the last prep block is styling readiness. What the studio needs from you depends on the shoot type — ghost mannequin has different demands from a lookbook, and both are different from a flat lay. Send the right sample size for the right format, and share styling references early.
Prepping Garments for Ghost Mannequin Photography
For ghost mannequin work, three things decide whether the final composite looks premium or amateur. First, the inner neck label must be flat, centred and clean — because it is visible in the invisible-neck composite frame. Second, send the exact mannequin-fit size; oversized clothing collapses the silhouette and no editor can rebuild the shape. Third, send an extra piece for the inner-back shot when the composite requires it.
Ghost mannequin looks effortless in the final image, but it is one of the most sample-sensitive formats we work with. Brands that plan their shoot format mix around sample readiness get consistently better catalogues at lower cost.
Prepping Garments for Model and Lookbook Shoots
Model and lookbook shoots forgive fewer sizing mistakes than ghost mannequin. The sample size must match the booked model’s measurements — share the model size chart with your sampling team the moment the model is confirmed, not the day before the shoot. Also send layering pieces, intended accessory pairings and any garms you want cross-styled between looks.
Bring bulldog clips only as a fallback. Well-fitted clothing photographs better than a badly-fitted piece rescued with clips — the drape shifts, the shoulder line breaks, and every editor will tell you clip removal is a retouch cost you shouldn’t be paying. A short pre-shoot call with your fashion model shoot team about garms and layering saves hours.
| Shoot Type | Sample Size Needed | Steaming Priority | Pieces per SKU | Special Prep |
|---|---|---|---|---|
| Ghost Mannequin | Mannequin-fit size | Critical | 1 + 1 backup | Neck label flat + inner-back piece |
| Flat Lay | Any size (usually M) | Critical | 1 | Perfect fold lines, no crease |
| Model Shoot | Match model measurements | High | 1 + 1 backup | Layering + accessories briefed |
| Lookbook | Match model measurements | High | 1 per look | Moodboard + garms combos briefed |
| Detail / Macro | Any | Medium | 1 | Trims, buttons, stitch detail clean |
Step 9: SKU Tracking and Sample Labelling That Prevents Studio Chaos
This is the section almost nobody talks about, and it is the single biggest operational difference between brands that produce catalogues cleanly and brands that keep re-uploading corrected images. Every piece of clothing that leaves your warehouse for the studio should carry a numbered tag, and every numbered tag should exist as a row on a printed sample manifest.
How to Build a Sample Manifest and Shot List
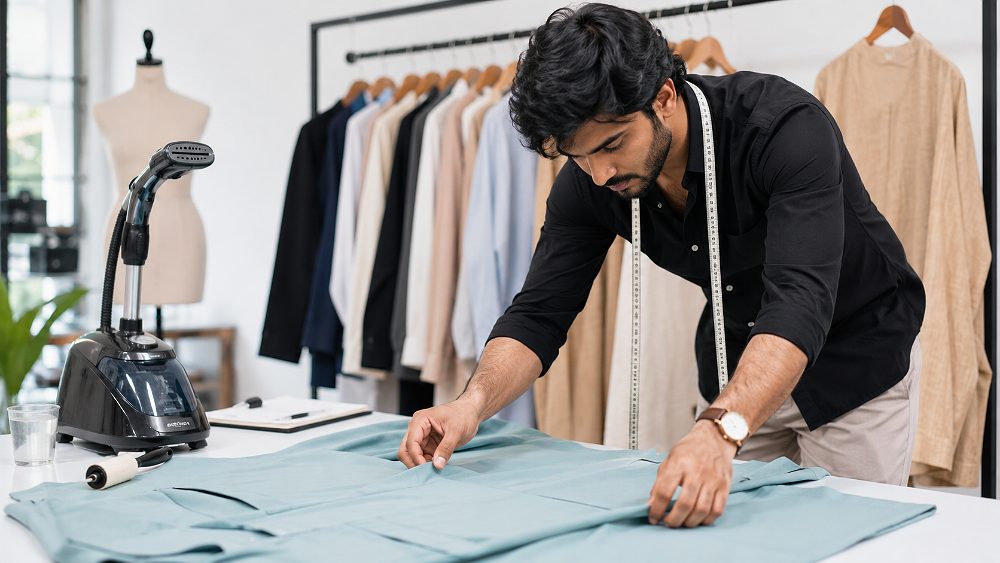
A sample manifest is a spreadsheet with these columns, in this order: SKU, Product Name, Colour, Size, Shoot Type, Number of Angles, Priority and Notes. Share it 48 hours before samples arrive at the studio. Match every physical tag number to a manifest row number — one to one, no exceptions — and photograph the SKU tag as the first frame of that garment’s set, so it acts as a visual separator during editing.
The manifest then becomes the delivery checklist for final image naming. If your ecommerce backend uses “KRT-2438-BLU-M” as the SKU string, name the shot files with the same string. Otherwise your catalogue manager spends a full day renaming 400 files. This is one of the clearest efficiency wins we see in high-volume apparel shot lists.
Barcode and Tagging Best Practice
Tie a numbered kraft paper tag to every garment with a soft cotton thread — never write on the fabric or on the brand label, and never staple through the fabric. Use the exact SKU string your ecommerce backend uses, not a shortened studio nickname, so files map cleanly to listings later. If you already run barcode-based inventory, print the SKU as both a human-readable number and a barcode on the same tag.
Step 10: Packing and Shipping Samples to the Studio
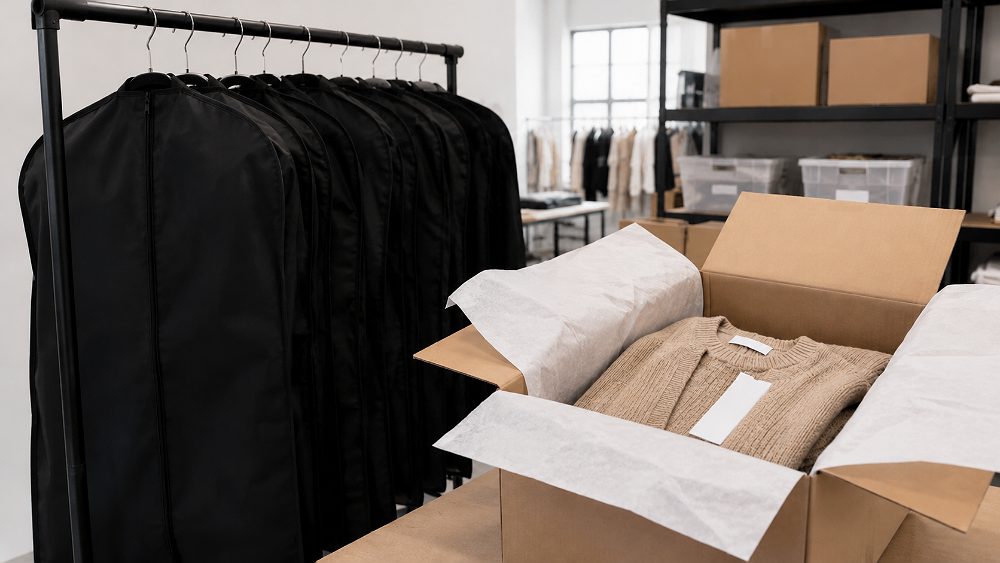
Packing is where hours of good prep get quietly undone. Use garment bags for structured shirts, blazers and delicate pieces; tissue-layer knits inside cartons; add silica sachets during Delhi NCR monsoon months to keep moisture off silks and rayons; and always label cartons by category rather than dumping SKUs randomly. Include a printed copy of the sample manifest inside carton one, tucked into a clear pouch.
Arrival timing matters too. Samples should reach the studio 48–72 hours before shoot day. That gives the studio time to verify intake against your manifest, hang out transit creases, flag missing or defective pieces and give you time to send replacements. Same-day arrivals push everything downstream and are the number one reason shoots overrun. Our team accepts drop-offs and paid pickups across the region — see the studio contact page for address and cutoff times.
Hanging vs Folded: What to Send and When
| Category | Hanging | Folded | Reason |
|---|---|---|---|
| Shirts, Blazers, Jackets | Yes | No | Shoulder line collapses when folded |
| Dresses, Kurtas, Gowns | Yes | No | Length creases are hard to remove |
| Knitwear, Sweaters | No | Yes (tissue-layered) | Stretches out of shape on a hanger |
| Denim, Trousers | Either | Yes (fold-safe) | Denim folds well; steam on arrival |
| Sarees | No | Yes (rolled, tissue) | Roll to protect zari and pleats |
| Innerwear, Lingerie | No | Yes (poly-lined boxes) | Hygiene and shape protection |
| Kidswear | Either | Yes | Small pieces fold safely |
Step 11–12: Accessories, Trims and the Styling Kit Checklist
The forgotten items are what stall shoots. Belts, dupattas, inner wear, footwear, jewellery, spare buttons, replacement thread reels, moodboard printouts, colour swatches or Pantone references, padded hangers, brand references from Instagram or lookbooks, and any specific pinning tools you want used. Pack the styling kit in a labelled box separate from the outfits themselves, so nothing gets lost in the garment bags.
Styling Kit Checklist
- Belts, dupattas, scarves and layering pieces per look
- Inner wear and shape wear for on-model shots
- Footwear for full-length model or lookbook shots
- Jewellery and accessories, boxed separately
- Padded hangers for structured outfits
- Spare buttons, thread reels, small repair kit
- Moodboard printout + brand reference images
- Colour swatch card or Pantone reference for editing
- Bulldog clips, invisible pins, double-sided tape (backup)
- Printed sample manifest inside carton 1
Garment Preparation for Fashion Photography Timeline (T-7 to Shoot Day)
Working backwards from shoot day is the cleanest way to run pre-production. A seven-day window is comfortable for a 50–100 SKU catalogue and can be compressed to five days if your sampling room is disciplined. What matters is that no step is left for shoot morning.
| Timeline | Action | Owner | Output |
|---|---|---|---|
| T-7 | Finalise SKU list & shoot brief | Merchandiser | Locked SKU sheet |
| T-5 | Pull & inspect samples | Sampling team | Inspection log |
| T-4 | Spot-clean & coordinate repairs | Sampling team | Backup pieces flagged |
| T-3 | Steam & de-thread all pieces | Prep team | Shoot-ready garms |
| T-2 | Tag with SKU + pack per category | Prep team | Tagged & boxed cartons |
| T-1 | Courier / drop-off + share manifest | Logistics + PM | Samples at studio + PDF manifest |
| T-0 | Final touch-up + intake verification | Studio + brand rep | Approved intake sheet |
10 Garment Preparation Mistakes That Cost Brands Money
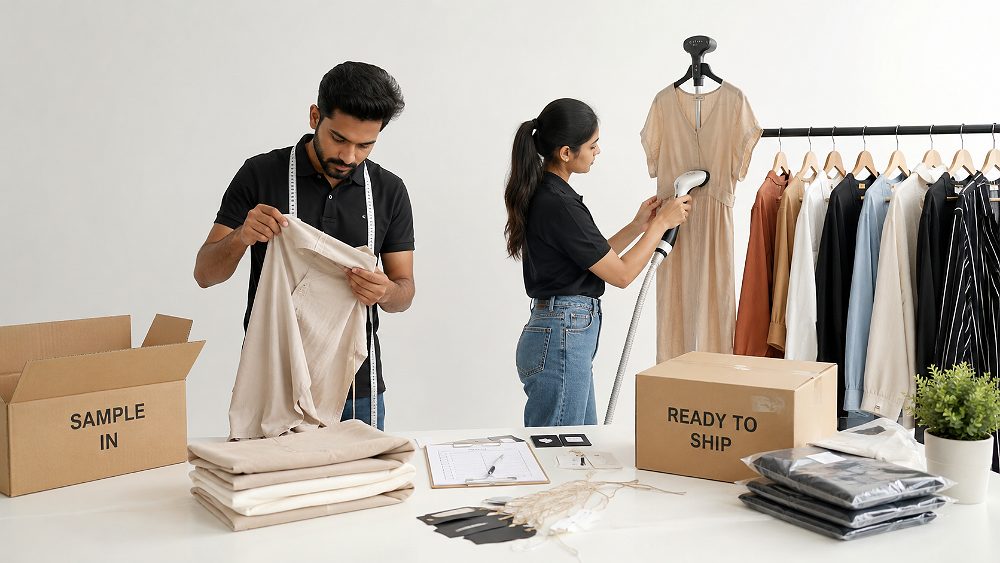
Across nine years of catalogue shoots at Uniqs Studio, these ten mistakes account for the majority of avoidable studio overruns and reshoots. Every one of them is a warehouse-side habit change, not a photography-side fix.
- Steaming on shoot day — damp fabric reads dull and clings; steam T-3.
- Sending wrong sample sizes — confirm model measurements first.
- Leaving MRP and barcode tags on — visible on every hero frame.
- Ignoring loose threads — the most common avoidable retouch.
- Packing steamed clothing flat — re-creases the moment the tape closes.
- No SKU manifest — turns a shoot into a naming project later.
- Only one piece of a high-value SKU — no backup, no reshoot.
- Forgetting accessories — belts, dupattas and footwear stall lookbook shots.
- Unwashed samples with factory odour or marks — never assume the studio will fix it.
- Assuming retouching will save everything — it cannot rebuild lost fabric texture.
Prep Cost vs Reshoot Cost: The Numbers Brands Should See
The commercial case for a proper prep SOP is straightforward: brand-side prep runs in the low tens of rupees per garment, a studio prep add-on runs in the low hundreds, and even a partial reshoot of 10–15 SKUs runs into the low tens of thousands once studio time, mannequin/model rebooking and re-editing are added up. The comparison table below uses realistic Delhi NCR pricing for context.
| Scenario | Time Required | Approx. Cost (INR) | Listing Delay | Risk Level |
|---|---|---|---|---|
| Brand-side in-house prep (100 SKUs) | 2 days | ₹3,000–₹6,000 total | None | Low |
| Studio prep add-on (100 SKUs) | 24–48 hrs | ₹12,000–₹16,000 total | None | Low |
| Partial reshoot (10–15 SKUs) | Half day | ₹12,000–₹25,000 | 3–5 days | Medium |
| Full reshoot (50+ SKUs) | 1–2 days | ₹60,000–₹1,20,000+ | 7–14 days | High |
Read the table as a decision tool, not a quote — actual pricing varies with fabric mix, shoot format and city. What is fixed is the shape of the curve: prep is always cheaper than reshoot, and reshoot is always cheaper than a delayed listing. Founders comparing this against their marketplace image SEO strategy quickly realise that consistent, on-time catalogues are worth more than shaving a few hundred rupees off prep.
Category-Wise Prep Checklist: Ethnic, Denim, Knitwear, Kidswear & Lingerie
Different apparel categories need different prep rules. Use this as a category-specific overlay on the main twelve steps.
Ethnic & Occasion Wear
Steam from the reverse of any zari, sequin or embroidery, roll sarees with tissue between pleats, and pack heavy lehengas with the ghera stuffed with tissue to preserve flare. Never fold zari borders sharply — the metallic thread cracks and shows on macro shots.
Denim
Denim tolerates handling but the waistband stitching resents over-steaming. Steam medium-heat at 5 cm distance, keep the fly and waistband dry, and never send raw-denim samples in poly bags — the dye rub-off marks lighter garms in the same carton. See our team’s marketplace photography playbook for denim-specific shot lists.
Knitwear & Winter
Knits stretch on hangers and show hanger-mark shoulders under studio light. Fold with acid-free tissue between layers, steam without stretching, and let them cool flat before mannequin dressing. Heavy winter coats need the collar and lapel supported with tissue to keep structure through transit.
Kidswear
Kidswear pieces are small enough to lose easily — tag every single piece even when the manifest looks obvious. Steam gently, watch for glue-on embellishment that melts under heat, and remove all choking-hazard safety warnings/stickers before the shoot.
Lingerie & Innerwear
Lingerie prep is hygiene-first: send new pieces only, poly-lined boxes, no lint on lace, and separate cartons from outerwear. Elastic bands memory-crease easily — never fold across a band. This is a category where the lingerie and loungewear photography workflow rewards careful prep more than any other.
Activewear
Performance fabrics show sweat marks and deodorant residue instantly under studio lights. Send unworn pieces only, avoid ironing (glaze marks show on synthetics), and steam from a safe distance. Bring the packaging so hangtag details can be shot separately if the listing needs them.
Uniqs Studio Garment Preparation Add-On Plans (Delhi NCR)
For brands that want the studio to handle prep instead of doing it in-house, we offer four tiers of garment preparation for fashion photography, priced by SKU volume. Prep is charged as an add-on to a shoot package — GST applicable, and volumes above 300 SKUs move to a retainer.
- Steaming and wrinkle removal
- Loose thread and lint removal
- Basic tag and sticker removal
- Intake check against your manifest
- Everything in Prep Essentials
- Fabric-wise steaming (delicate + embellished)
- Sample inspection report with defect flags
- SKU tagging and shot-list mapping
- Styling prep: pinning, padding, shape correction
- Everything in Shoot Ready
- Spot cleaning & minor repair coordination
- Dedicated prep coordinator
- Sample pickup across Delhi NCR
- Pre-shoot approval frames per category
- Sample return packing & dispatch
- Everything in Full Pre-Production
- On-site prep team & steaming station
- Sample storage & inventory management
- Custom SKU workflow with your backend
- Priority scheduling & guaranteed slots
- Quarterly SOP training for your team
What Happens When Your Samples Reach Uniqs Studio
Once cartons arrive at the studio, our intake team verifies every piece against your printed manifest, flags missing SKUs and defective pieces the same day, and sends you a written intake summary before shoot morning. Any garment that needs steaming, de-threading or minor repair is routed through our in-house prep station so nothing eats into your booked shoot hours. This is how we keep garment preparation for fashion photography from ever becoming a shoot-day problem.
For brands that want brand-side visibility, we run SKU-wise shot tracking through the day and share same-day approval frames per category — so you sign off on hero angles before we shoot the rest of that SKU. It is the kind of process transparency that keeps our long-term clients on model photography and catalogue programmes over multiple seasons.
In-House Prep Services and Turnaround
Our prep add-on runs same-day to 72 hours depending on SKU volume, and we offer paid sample pickup across Delhi, Gurgaon, Noida, Faridabad and Ghaziabad. For most 100-SKU catalogues, brands who add our Shoot Ready tier see materially fewer retouch rounds and a faster route to marketplace go-live. If you want a specific quote for your next drop, reach Satyam directly at +91-8076745824 or [email protected].
Frequently Asked Questions
How should I prepare garments for fashion photography?
Inspect every sample for stains, damage and fit accuracy, remove loose threads and lint, steam or press according to the fabric type, take off price tags, barcode stickers and security tags, complete any pinning or shape correction, then tag each piece with its SKU and pack it with a printed manifest. Samples should reach the studio 48–72 hours before the shoot.
Should clothes be steamed or ironed before a photoshoot?
Steaming is safer for most photoshoot garments because it relaxes creases without flattening fabric texture or creating shine. Use an iron with a pressing cloth only for crisp cotton and linen where sharp structure is needed. Never iron directly over prints, sequins, zari or velvet.
Do I need to remove tags before clothing photography?
Yes. Remove MRP tags, price tags, barcode stickers, size stickers and security tags before the shoot, as they appear in frame and increase retouching cost. Keep brand and care labels attached to the garment — pin or tuck them out of view instead of cutting them off, so the sample stays saleable.
How many days before the shoot should samples reach the studio?
Send samples 48 to 72 hours before the shoot date. This allows time for intake verification against your manifest, hang-out time to release transit creases, steaming, and flagging of any defective or missing SKUs while you still have time to send replacements.
Does the studio steam the clothes or does the brand?
Both models work. Most brands do basic steaming in-house and the studio does final touch-ups on set. If you are shooting a large catalogue or delicate fabrics, a studio prep add-on is more reliable — at Uniqs Studio, garment preparation for fashion photography is offered as a paid add-on with same-day to 72-hour turnaround across Delhi NCR.
Final Pre-Shoot Checklist and Next Steps
Here is the twelve-point garment preparation checklist to run before every fashion or catalogue shoot. Print it, keep it on the sampling room wall, and hold every drop against it before dispatch.
The 12-Point Pre-Shoot Checklist
- Confirm every sample is a production piece in the correct shoot size
- Inspect under daylight-balanced light for stains, marks and damage
- Remove all loose threads, lint and pilling (after steaming)
- Steam by fabric type; iron only crisp cottons and linens
- Give steamed pieces 15–20 minutes to dry on the hanger
- Remove MRP, barcode, security and size stickers
- Tuck brand and care labels — never cut them off
- Style-prep by shoot type (ghost mannequin vs model vs flat lay)
- Tag each SKU with a numbered kraft paper tag
- Build a manifest that maps tags → SKUs → shot count
- Pack correctly: garment bags for structured, tissue for knits
- Deliver samples 48–72 hours before shoot day, manifest in carton 1
If you’d like our team to run this SOP for your next catalogue — or if you just want a quote on a shoot package with prep bundled in — send your SKU list to [email protected] or WhatsApp +91-8076745824. We reply within 24 hours with a shoot plan, prep scope and a written quote.
Send us your SKU list. Get a shoot plan back in 24 hours.
Trusted by clothing brands, manufacturers and D2C labels across Delhi, Gurgaon, Noida, Faridabad and Ghaziabad.