
Garment Photography for Ecommerce: The Complete 2026–27 Guide to Images That Sell
A definitive playbook from Uniqs Studio Delhi NCR — covering formats, studio setup, editing workflow, marketplace specs and real 2026 pricing for D2C brands, marketplace sellers and apparel manufacturers.
- Great garment photography is the single highest-leverage input for ecommerce conversion in 2026–27 — bigger than paid ads, bigger than copy.
- Every apparel SKU needs at least 5–7 images: hero, back, side, detail, tag, and one lifestyle or on-model frame.
- Ghost mannequin gives you marketplace scale; on-model gives you D2C storytelling — most winning brands run both.
- India pricing in 2026–27 sits between ₹149 and ₹1,499 per SKU depending on format, retouching and volume.
- The gap between amateur and professional apparel photography is now measurable — usually a 2–3× uplift in add-to-cart rate.
- What Is Garment Photography?
- Why It’s the #1 Conversion Lever in 2026–27
- Types of Garment Photography Every Brand Needs
- Pre-Production Checklist
- The Ideal Studio Setup
- Step-by-Step Shoot Day Workflow
- Post-Production & Editing Workflow
- Marketplace Image Guidelines (India 2026)
- Garment Photography Pricing (2026–27)
- DIY vs Professional Studio
- 9 Costly Mistakes to Avoid
- How AI Is Reshaping Garment Photography
- Why Choose Uniqs Studio
- FAQs
- Final Action Plan
If your ecommerce catalogue is not converting the way it should, the answer is almost always sitting inside your image folder — not your ad account. In nine years of running Uniqs Studio across Delhi NCR, I have watched hundreds of D2C clothing brands and marketplace sellers scale on the back of clean, category-correct garment photography — and I have watched just as many stall because their apparel images look amateur next to their competitors on Amazon India, Myntra and Flipkart. This 2026–27 pillar guide is the same playbook we hand our own studio clients — from prep and lighting to editing, marketplace specs and per-SKU pricing.
What Is Garment Photography?
Garment photography is the specialised discipline of shooting clothes — shirts, dresses, sarees, denim, innerwear, kidswear, activewear — in a way that translates fit, fabric and finish onto a small ecommerce thumbnail. It sits at the intersection of product photography and fashion photography, but it plays by ecommerce rules: neutral backgrounds, consistent framing, colour-accurate fabric, and repeatable output across hundreds of SKUs. At Uniqs Studio, we treat garment images as commercial assets first and creative work second, because that is what makes them sell on a working ecommerce catalogue.
The confusion between clothing photography, apparel photography and editorial fashion is worth clearing up early. Editorial fashion sells a mood; ecommerce garment photography sells the actual garment. That is why our workflow — from ghost mannequin to on-model catalogue frames — is engineered around clarity, symmetry and marketplace-grade retouching, not around drama or styling flair.
Why Garment Photography Is the #1 Conversion Lever for Ecommerce in 2026–27
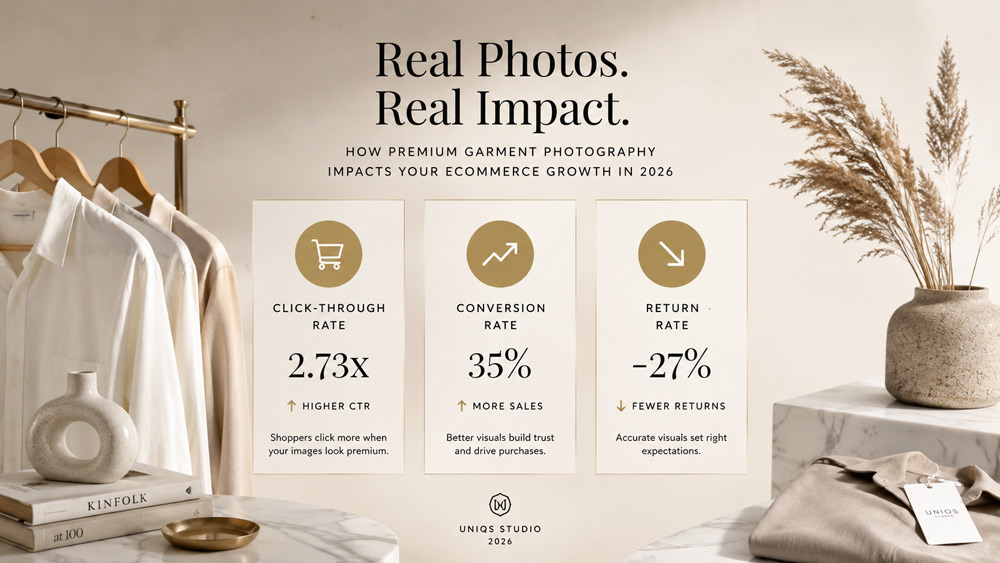
The single most important number on any apparel product page is not the price — it is the image quality delta between you and the next brand in the search results. Industry research consistently shows that around 75% of online shoppers rely on the product image to decide whether to click; for clothing that figure is even higher because the buyer cannot touch the fabric or try the fit. Weak clothing ecommerce images quietly bleed conversion at the top of the funnel, and they bleed margin at the bottom through returns.
Return rates in Indian apparel ecommerce sit between 18% and 30% for most categories, and a large chunk of that is driven by the phrase every seller dreads: item looks different in real life. Sharp, colour-accurate garment product images compress that gap. We regularly see brands cut their return rate by 5–8 percentage points inside a quarter, purely by re-shooting their existing catalogue with proper ghost mannequin technique and consistent retouching — before touching a single ad campaign. If you want the deeper business case, our breakdown on how fashion photography increases clothing sales walks through the exact numbers.
Types of Garment Photography Every Ecommerce Brand Needs
There is no single “best” format for ecommerce garment photography — there is a right format for each SKU, each price point and each channel. Amazon and Meesho favour clean, high-contrast product-only frames; Myntra and Ajio reward editorial on-model shots; a D2C store on Shopify usually blends both plus lifestyle. Below are the five formats every serious apparel brand should have in its shooting toolkit.
Ghost Mannequin Garment Photography
Ghost mannequin — also called invisible mannequin — is the workhorse format of the entire industry. The garment is shot on a mannequin, the interior of the neckline is captured separately, and the two frames are composited so the clothes float in space with a clean 3D silhouette. It gives you fit and structure without model or usage licensing, and it scales beautifully across menswear, womenswear and kidswear. Studies from major retouching houses put the CTR uplift over flat lay at roughly 27%, which is why our ghost mannequin service is the most-booked catalogue format at the studio.
If you want a deeper category comparison, the piece on ghost mannequin vs on-model vs flat lay for Amazon, Flipkart and Myntra maps each format to each channel, and the sales-impact case study on Indian brands shows the numbers we consistently see post-reshoot.
On-Model Garment Photography
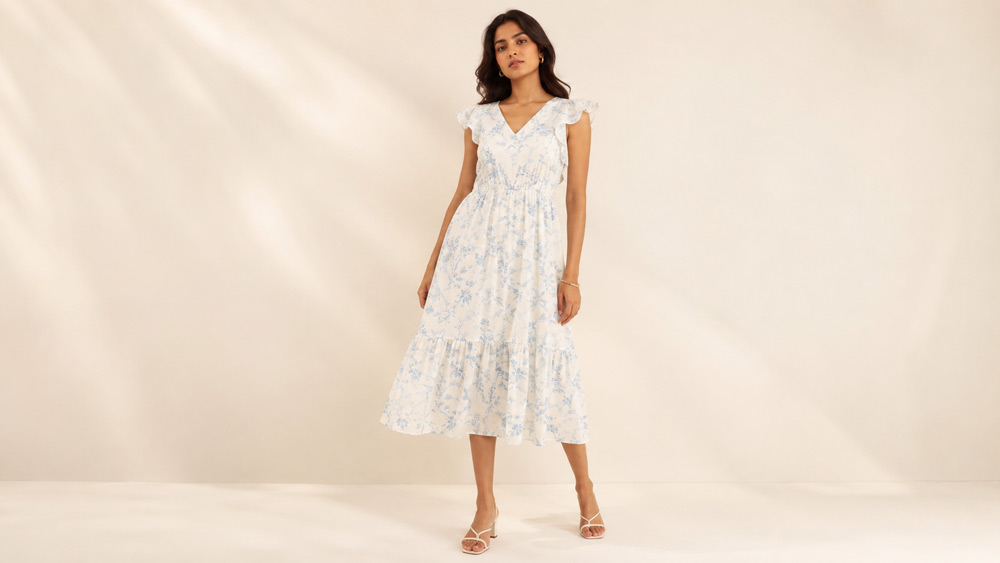
On-model shots are how you sell drape, movement and emotion — the things a flat mannequin can never do. This is the format that unlocks Myntra editorials, Instagram carousels and Shopify home-page banners. It is more expensive per shot because of model fees, styling and hair-makeup, but it does the heavy lifting for hero SKUs, launches and brand-building campaigns. At Uniqs Studio we usually recommend on-model for the top 20% of SKUs that drive 80% of your revenue, and ghost mannequin for the long tail.
Casting is half the job — the model has to match your brand persona and target buyer. Our post on casting-to-campaign for fashion brands and the Delhi NCR modeling portfolio guide walk through how we brief, cast and shoot for D2C clients.
Flat Lay & Knolling Garment Photography
Flat lay is the format everyone underrates. Done well, it gives you scroll-stopping thumbnails that read instantly on a mobile screen — perfect for Instagram, Meesho and Shopify collection pages. Knolling — precise, right-angle styling with accessories — lifts a plain shirt shot into a scene that tells buyers how to wear it. Our flat lay photography team uses this format constantly for basics brands and accessory-heavy launches.
Hanger & Dummy Shots
Hanger and dummy shots are your budget-tier format — the right choice for wholesale catalogues, B2B linesheets and long-tail SKUs where the goal is a functional image at the lowest possible cost. They will not win beauty contests, but they get thousands of garms live on a marketplace inside a week.
360° & Video Garment Photography
Marketplaces are giving increasing weight to video slots on the PDP, and buyers on Nykaa Fashion and Ajio now expect at least a short spin clip on hero SKUs. Uniqs Studio’s ecommerce video production team shoots 360° garment spins, model motion clips and Instagram reels in the same session as the still shoot, which is the only way to keep per-SKU cost sensible.
Pre-Production Checklist for a Successful Garment Photoshoot
Every profitable garment photoshoot is won or lost before the first frame is fired. Roughly 40% of shoot-day delays we see are caused by unpressed samples, missing size tags or unclear shot briefs — all of which are cheap to fix the day before. A tight pre-production process turns a chaotic 12-hour day into a calm 8-hour day, and it is the single biggest lever on per-SKU cost.
Sample Sorting, Steaming & Prep
Every apparel piece has to arrive at the studio steamed, lint-rolled and tagged with SKU and colour. We batch samples by fabric weight and colour family, because grouping similar garms together lets us keep lighting and white balance consistent through the shoot. If your samples arrive wrinkled, you are paying your photographer to iron — which is the most expensive ironing service in the country.
Styling Kit & Pinning Techniques
A proper styling kit is invisible in the final image but responsible for the whole look — clamps, bulldog clips, tissue paper for volume, gaffer tape, transparent thread and a well-organised pin box. Pinning is a craft: too little and the outfit looks droopy, too much and the garment loses its natural drape. Our stylists follow a checklist per garment type — shirts, sarees, dresses, denim, innerwear — so pinning is repeatable across the whole catalogue.
Shot List & Angle Planning
A shot list is a spreadsheet, not a suggestion. For every SKU we lock: 1 hero front, 1 back, 1 side, 2 fabric/stitch details, 1 tag/label and 1 lifestyle or on-model. Angle planning matters equally — the same lens and same distance for every hero shot is what makes a catalogue look like it came from one brand instead of ten photographers. The full framework we use lives in our model photoshoot preparation checklist, which adapts cleanly to ghost mannequin work too.
The Ideal Garment Photography Studio Setup
A working garment photography studio does not need to be flashy — it needs to be calibrated. The three pillars are lighting, capture and backdrop, and each one has non-negotiable specifications if you want output that matches Myntra or Amazon-grade catalogues. This is where the difference between a rental cyc-wall and a dedicated apparel studio really shows up.
Lighting Setup for Garment Photography
Our standard apparel photography rig at Uniqs Studio runs on four Godox SK 400 II heads and two Elinchrom FRX 400 units, shaped with four strip softboxes and two octaboxes for soft, wraparound light. For colour-critical shoots we colour-match every strobe to 5500K and hold a 3:1 key-to-fill ratio, which keeps fabric texture visible without crushing the shadows. The rim light is what separates a cheap product shot from a premium one — it lifts the edge of the garment off the backdrop and gives depth on a flat white background.
Camera, Lens & Tethering
We shoot the entire garment line on full-frame mirrorless bodies — usually a Sony A7R V and a Canon R5 as the backup — paired with a 50mm and 85mm prime for hero frames and a 100mm macro for fabric close-ups. Every frame is tethered into Capture One so the stylist, photographer and client review on the same calibrated screen in real time. Tethering is what makes reshoots cost nothing on shoot day — the mistake is seen before the model changes.
Backdrop, Cyc Wall & Surface
Seamless white (pure 255) for marketplace, ivory for editorial, textured linen or concrete for lifestyle — those three surfaces cover 95% of every apparel brief we shoot. A proper infinity cyc wall matters because it removes the horizon line and makes retouching almost free. Any studio still shooting garms against a roll-up backdrop with a visible crease is quietly adding editing hours to your bill.
Step-by-Step Garment Photography Workflow (Shoot Day)
A well-run shoot day is boring in the best way — it looks like a factory floor, not a fashion set. Below is the exact five-step sequence we run at Uniqs Studio for a typical 60–80 SKU day. Following it in order is the difference between finishing on time with clean files and finishing at midnight with a hard-drive full of reshoots.
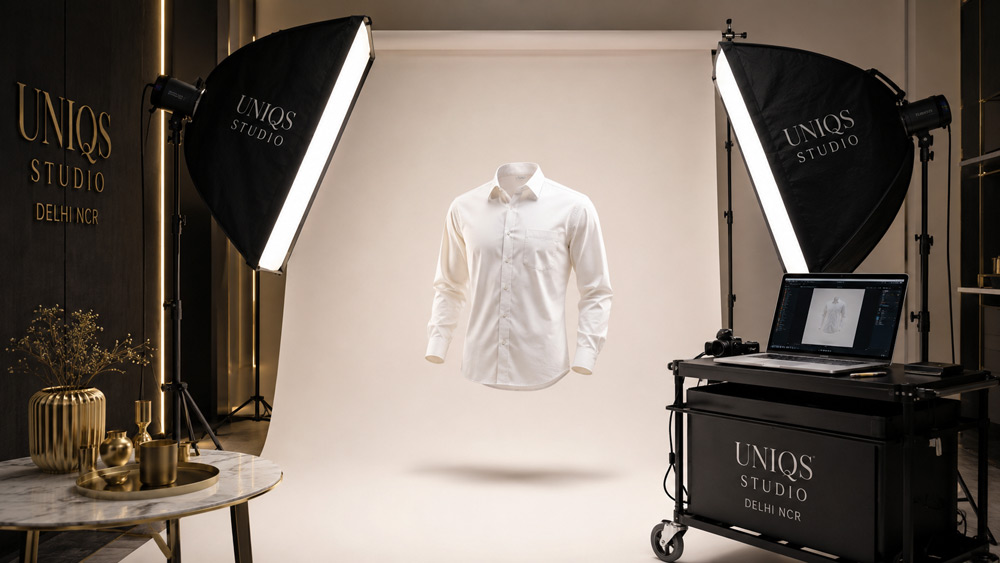
Behind the scenes of a Uniqs Studio garment photography shoot day — from steamer to storefront.
1. Setting Up the Mannequin or Model
The mannequin is placed on floor-tape marks so every frame lines up. On-model shoots start with a wardrobe run-through, hair and makeup lock, and a 10-minute lighting test on a stand-in before the first outfit lands on set.
2. Capturing Hero, Detail & Tag Shots
Every SKU is shot in a fixed sequence — hero, back, side, fabric detail, tag — which is what gives a 500-SKU catalogue its consistency. The tethered laptop displays a live checklist so no shot gets missed, which is the single most common way small brands lose time on reshoots.
3. Real-Time Review & Reshoot Loop
The stylist and photographer review each SKU on the tether screen before the model or mannequin is unpinned. Any issue — hairline wrinkle, hem lift, colour cast — is corrected inside the same setup, not at the retouch stage where fixes cost 10× more.
Post-Production Workflow: Editing Garment Photography That Sells
Retouching is where garment photography either becomes a scalable business or a bottleneck that kills your delivery timeline. A modern apparel studio does not treat post-production as an afterthought — it treats it as 40–60% of the total per-SKU cost. Our pipeline runs on Photoshop, Capture One and a small stack of AI-assisted tools, all governed by strict marketplace export presets.
Clipping Path & Background Removal
Every apparel frame gets a hand-refined clipping path — AI does the first 80%, our retouchers do the last 20%. The pure white 255,255,255 background is a hard requirement for Amazon and Flipkart, and it is unforgivably obvious when it is wrong.
Ghost Mannequin Compositing
The invisible mannequin effect is a two-frame composite — the main outfit shot plus a separate frame of the interior neckline. Our retouchers align the two, blend the lining, and add a subtle interior shadow so the garment reads as a real 3D form. It is the trickiest step in the pipeline and the reason cheap ghost mannequin work looks flat.
Colour Correction & Fabric Retouching
Colour accuracy is the number-one driver of return rates in apparel ecommerce. Every SKU is colour-matched against a physical fabric swatch on a calibrated monitor, then fabric texture is preserved through skin-friendly retouching — no plastic smoothing, no over-cleaning that erases the weave. This is exactly why the industry treats post-production as a craft even for high-volume work.
Batch Export & Marketplace Formatting
The final step is batch export — one master TIFF per SKU plus platform-specific JPGs sized to 2000×2000, 1500×2000 and 1080×1350 depending on channel. Every file is renamed to the client’s SKU code so upload is a drag-and-drop, not a hunt.
Marketplace Image Guidelines for Garment Photography (India 2026)
Marketplace image rules are quietly the most expensive part of ecommerce apparel photography — one non-compliant file and the entire listing gets suppressed. Below is a compact 2026 summary; treat it as a starting point and always check the current seller portal before a bulk upload.
Amazon India Apparel Image Rules
Pure white background (RGB 255,255,255), minimum 1000×1000 for zoom, 85% frame fill, no watermarks, no props, no additional text. Reference Amazon Seller Central India for the current spec.
Flipkart Clothing Image Specs
Flipkart accepts model, ghost mannequin and flat lay for apparel, minimum 2000×2000 recommended, sharp focus, no borders, no collages. The Flipkart Seller Hub publishes category-specific guides.
Myntra & Ajio Editorial Standards
Myntra and Ajio expect editorial on-model work — 5–7 frames per SKU, natural pose, ivory or contextual background, model brief locked with the account manager. This is the most demanding channel and the reason we treat Myntra shoots as small campaigns rather than catalogues.
Nykaa Fashion, Meesho & FirstCry
Nykaa Fashion leans editorial, Meesho leans functional-flat, and FirstCry has strict kidswear safety guidelines. If you sell across all three, your shooting plan needs three parallel treatments — the same garment shot three different ways.
Garment Photography Pricing in India (2026–27 Benchmarks)
Pricing for garment photography services in India in 2026–27 is finally settling into predictable bands after two chaotic post-COVID years. Where you land inside these bands depends on three variables: format (flat lay vs ghost vs on-model), retouching depth, and monthly volume. For context, our detailed piece on fashion photography cost in Delhi and the model photoshoot pricing guide break each variable down further.
| Plan | Basic Catalogue | Standard Ecommerce | Premium D2C | Enterprise Bulk |
|---|---|---|---|---|
| Ideal For | Small boutiques, first-time sellers | Marketplace sellers | D2C brands | Manufacturers, 500+ SKUs |
| Shots per SKU | 3 | 5 | 8–10 | Custom |
| Format | Hanger / Flat Lay | Ghost Mannequin | Ghost + On-Model | Full mix + Video |
| Retouching | Basic clipping | Advanced | Premium | Batch premium |
| Turnaround | 5 days | 4 days | 3 days | Custom SLA |
| Marketplace Export | ✓ | ✓ | ✓ | ✓ + A+ Content |
| Revisions | 1 | 2 | Unlimited* | Custom |
| Price (INR / SKU) | ₹149–₹249 | ₹349–₹599 | ₹799–₹1,499 | On Request |
| Get Started | Book Now | Get Quote | Consult | Talk to Sales |
*Fair-use policy — typically 2–3 revision rounds per SKU.
Call Satyam directly at +91-8076745824 or email [email protected] for a same-day estimate.
DIY vs Professional Garment Photography Studio: What’s Right for Your Brand?
The DIY-versus-studio decision is really a math problem, not a philosophical one. If you are shooting under 30 SKUs a month and comfortable spending a full weekend per shoot, DIY is defensible. Once you cross 50 SKUs a month or start seeing your images side-by-side with a competitor’s professional catalogue, the math flips hard toward a professional garment photography studio.
The hidden cost of DIY is almost never the camera — it is the retouching hours and the reshoots. One D2C womenswear brand we worked with was spending 22 hours a week editing their own product photography before switching to Uniqs Studio; that time was worth more than the entire per-SKU shooting fee they were paying us. If you are weighing a physical studio vs an outdoor location, the piece on studio vs outdoor shoots is worth reading first.
| Approach | Pros | Cons |
|---|---|---|
| DIY (Phone) | Zero fixed cost, fast iteration | Poor colour, inconsistent framing, high return rate |
| Freelancer | Cheaper than studio, flexible | Inconsistent quality, no retouching pipeline, capacity limits |
| Uniqs Studio | Marketplace-grade output, tethered workflow, unified retouching, SLA-backed delivery | Higher upfront per-SKU cost |
| AI-Generated | Very cheap, instant | Poor fabric accuracy, not marketplace-compliant, high return risk |
9 Costly Mistakes That Kill Garment Photography ROI
After nine years of shooting apparel for Indian brands, the same nine mistakes show up on almost every audit we run. Each one is small on its own; together they can turn a well-shot catalogue into a conversion drag. Fix these first before you spend another rupee on ads.
- Inconsistent framing across SKUs — hero shots at different distances make the catalogue look like it came from ten different brands.
- Wrong white balance — the top cause of return rates in Indian apparel ecommerce.
- Ghost mannequin composite errors — misaligned neckline shots that make garms look flat instead of 3D.
- Over-retouched fabric — plastic-looking cotton and linen that shoppers instantly distrust.
- Wrinkled samples — no amount of retouching saves an un-steamed shirt.
- Poor tag/label shots — buyers zoom into label images more than any other frame.
- Missing back and side angles — a leading cause of “item looks different” returns.
- Non-marketplace-compliant exports — one wrong-size file gets the whole listing suppressed.
- Skipping the lifestyle frame — the shot that most influences add-to-cart on Instagram traffic.
How AI Is Reshaping Garment Photography in 2026–27
AI in apparel photography is real, useful and — critically — not a replacement for the camera in 2026. Where it helps: 80% of clipping-path work, first-pass colour matching, and generating background swaps for lifestyle context. Where it fails, badly: fabric texture, drape simulation, model-swap on fitted garms, and anything that involves actual light interacting with actual cloth. That is why every serious D2C brand we work with treats AI as an accelerator layered on top of real photography, not a replacement for it.
We hard-recommend against pure AI-generated garment images for marketplace catalogues — they inflate return rates because the buyer receives a real garment that does not match the imagined one. The 2026 fashion photography trends piece covers this in more depth and shows where the industry is actually heading.
Why Choose Uniqs Studio for Garment Photography
Uniqs Studio has spent nine years and 500+ D2C and marketplace brands learning exactly what turns a shoot into a sale. We run a dedicated apparel studio in Delhi NCR calibrated for ghost mannequin, on-model and flat lay, with a tethered workflow and an in-house retouching team so nothing leaves our hands as a half-finished file. Satyam personally reviews every hero SKU before delivery — which is why our clients on Amazon, Flipkart and Myntra keep sending their next-season catalogues back to us.
If you want a same-day quote, WhatsApp us at +91-8076745824 or drop a note to [email protected]. For everything else, our about page and contact page are the fastest way in.
Frequently Asked Questions About Garment Photography
The five questions we get asked most often by D2C founders, ecommerce managers and marketplace sellers — answered in plain language.
Garment photography for ecommerce is the specialised process of shooting clothing — on ghost mannequins, live models, flat lays, or hangers — to produce marketplace-ready images that showcase fit, fabric, and detail for online shoppers.
Garment photography in India typically ranges from ₹149 to ₹1,499 per SKU depending on format, retouching depth, and volume. Bulk catalogues and enterprise packages are custom-quoted.
Ghost mannequin is faster, cheaper, and marketplace-standard for scale. On-model conveys fit, drape, and lifestyle, driving stronger D2C conversion. Most brands blend both.
Marketplaces recommend 5–7 images per SKU: a hero front shot, back, side, detail (fabric/stitch), tag/label, and a lifestyle or on-model shot for context.
Standard turnaround at Uniqs Studio is 3–5 business days for shooting plus retouching. Bulk enterprise catalogues follow a custom SLA agreed upfront.
Final Verdict: Your 2026–27 Garment Photography Action Plan
Your action plan for 2026–27 is short: audit your top 20% of revenue SKUs, reshoot them first with proper ghost mannequin and on-model coverage, standardise your retouching pipeline, and only then rebuild the long tail. Do that in the next 90 days and your conversion rate will move before your ad spend does. When you are ready to talk numbers, Satyam is on +91-8076745824.
- What is garment photography?
- How much does garment photography cost in India?
- What is the best garment photography for ecommerce?
- How do you photograph clothes for online selling?
- What is the difference between garment and fashion photography?
- Which is better: ghost mannequin or on-model garment photography?
- What are Myntra’s garment photography requirements?
- How do I choose a garment photography studio?
- What lighting is best for garment photography?
- What is the turnaround time for garment photography?
- What resolution should ecommerce garment images be?
- How do I reduce returns with better garment photography?
- Can AI replace garment photography?
- who does the best garment photography near me
- how much does clothing photography cost per shot in India
- what is the best studio for ecommerce garment photography in Delhi
- how do I get my clothes photographed for my online store
- should I hire a photographer or shoot clothes myself
- what does a garment photoshoot include
- how do I photograph clothes for Amazon and Flipkart