
Oxidised jewellery photography is one of the trickiest jobs in a jewellery studio. Grey metal, deep black engraving and tiny textured motifs can turn flat, muddy or even blue the moment you put them under the wrong light. At Uniqs Studio we treat silver as its own category, separate from gold and diamonds, because the problems and the fixes are completely different.
This guide comes straight from the shoot floor of our jewellery photography studio in Delhi, where Satyam and the team have spent more than 9 years photographing ecommerce products for 500+ D2C brands and marketplace sellers. You will learn why silver misbehaves on camera, how to prepare pieces without stripping their patina, which lights, backgrounds and settings work, and the exact 9 shots that help oxidised and silver jewellery sell online.
- Silver has almost no colour of its own, so the light and white balance decide how it looks.
- The black oxidation in recesses is part of the design — clean the high points, never the patina.
- Long strip softboxes plus white and black cards give bright silver edges and readable engraving.
- A custom white balance from a grey card stops the blue cast that ruins most silver photos.
- Nine planned shots — hero, angle, macro, back, scale, on-body, lifestyle, set and video — answer every buyer question.
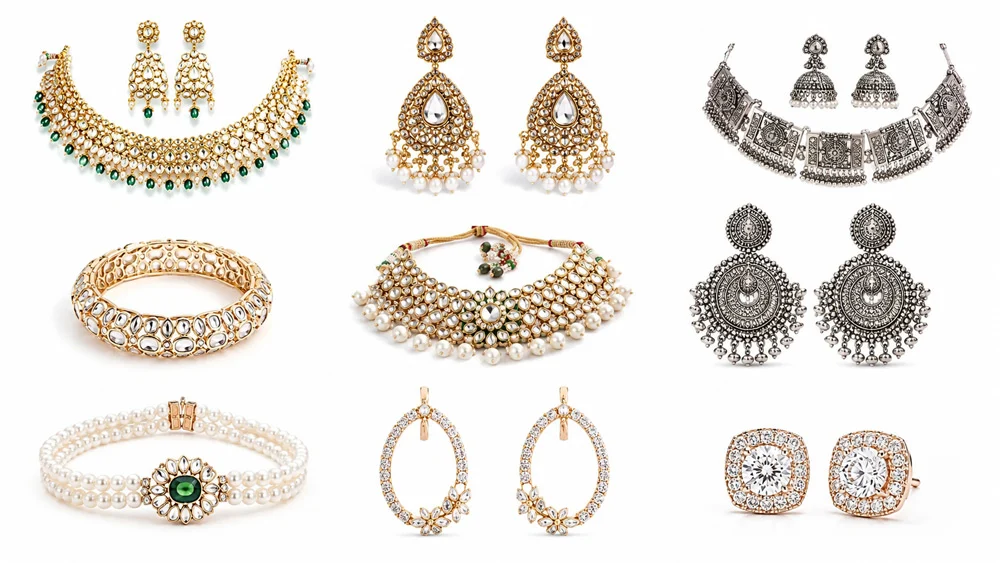
Why does oxidised and silver jewellery look flat or blue in photos?
Silver looks flat because it has no colour of its own — it simply mirrors whatever surrounds it. If the room is grey, the silver turns grey; if the light is cool or mixed, it turns blue. Oxidised pieces add a second challenge: the dark recesses swallow light, so detail disappears unless you light them on purpose.
Grey metal has almost nothing for the camera to hold on to
Gold carries a warm yellow that the camera records easily, even under average light. Silver is close to neutral, so the sensor has very little colour information to work with. When the reflections around the piece are dull, the whole product reads as dull. That is why a silver ring shot next to a window often looks like cheap steel in the final listing, while the same ring under controlled studio light looks premium.
The black oxidation is part of the design, not dirt
In oxidised and tribal jewellery, artisans deliberately darken the recesses so the raised motifs stand out. Good oxidised jewellery photography keeps that contrast: bright silver on the high points and rich black in the grooves. Over-lighting flattens it to a uniform grey, while under-lighting turns the grooves into empty black holes. Your job is to protect both ends of the tonal range at the same time.
Cool white balance and mixed light create the blue cast
Auto white balance tends to push neutral metal towards blue, especially when the frame is mostly white or grey. Mixed light — a warm tube light in the room plus a cool LED panel — makes it worse, because one side of the piece turns warm and the other cold. Buyers then receive a product that looks different from the photo, and that mismatch is one of the most common reasons for “not as shown” returns.
How is oxidised jewellery photography different from gold and diamond shoots?
Gold shoots are about controlling warm reflections and diamond shoots are about sparkle, but silver shoots are about tone and texture. With oxidised jewellery photography you light for contrast between bright metal and dark patina, and you guard the neutral colour more carefully than with any other metal.
The table below shows how the Uniqs Studio team changes the plan for each metal type. It is a quick way to brief a photographer or to check your own setup.
| Factor | Gold | Diamond / AD | Sterling silver | Oxidised / German silver |
|---|---|---|---|---|
| Main goal | Rich, even warm tone | Sparkle and clarity | Bright, clean neutral shine | Contrast between motifs and patina |
| Biggest risk | Orange or green reflections | Dead, grey stones | Blue cast, grey look | Lost engraving, flat grey |
| Key light | Large diffused soft light | Small hard light for fire | Long strip softbox | Strip softbox at a low side angle |
| Cards | Gold or white bounce | Black cards for edges | White cards for clean reflections | White for highlights, black for depth |
| Retouch focus | Tone consistency | Stone cleanup | Neutral colour, dust | Keep blacks, remove dust only |
How do you prepare silver and oxidised pieces before the shoot?
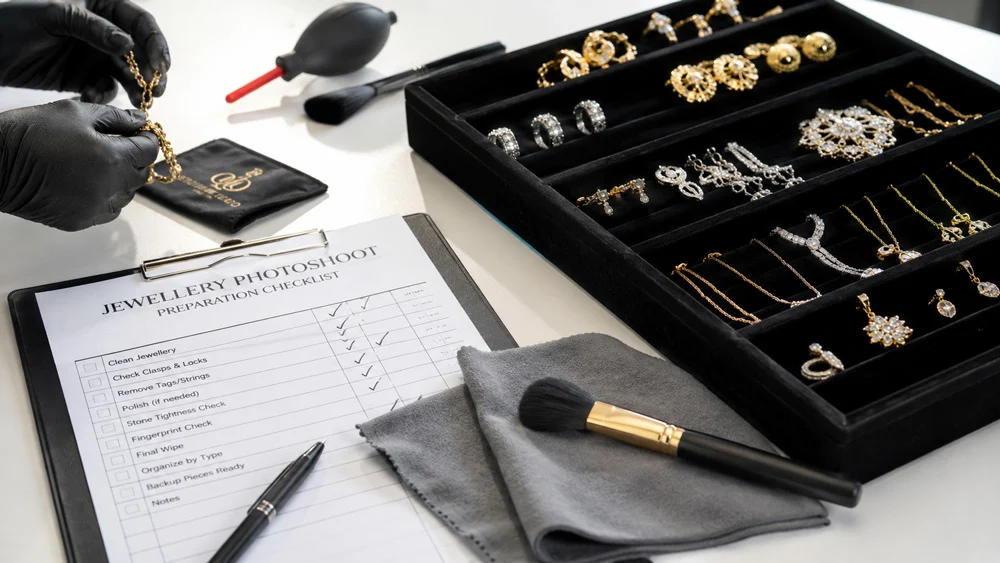
Good oxidised jewellery photography starts before the camera comes out: clean the high points, protect the patina and handle everything with gloves. Silver picks up fingerprints and dust faster than gold, and polishing the wrong area can remove the oxidation that gives the piece its character. Thirty minutes of preparation saves hours of retouching later.
At Uniqs Studio every silver order goes through a simple preparation routine before a single frame is shot. It is the same routine we suggest to sellers who send pieces by courier from outside Delhi.
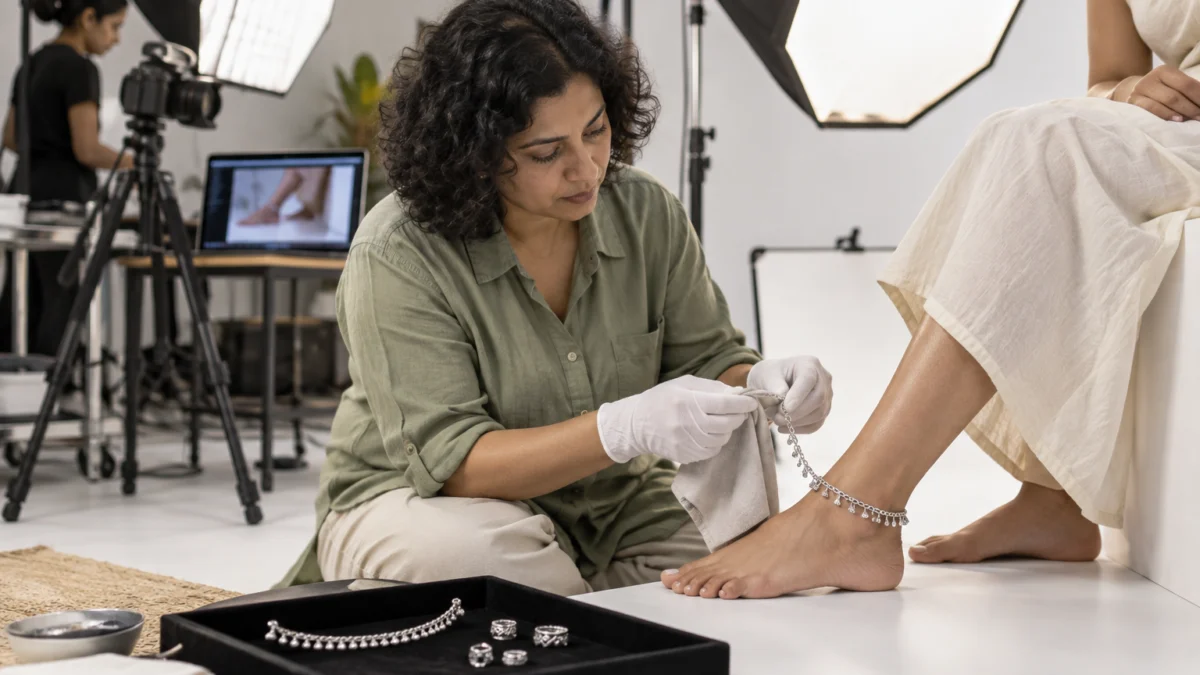
- Unpack with cotton or nitrile gloves so no fingerprints land on polished surfaces.
- Wipe sterling silver gently with a soft silver cloth to lift light tarnish from flat, polished areas.
- Do not polish oxidised recesses — use a soft brush and an air blower to clear dust from the grooves instead.
- Check stones, ghungroos and jump rings for loose parts, bent hooks or tangled chains.
- Keep pieces in anti-tarnish pouches until their turn on set, especially in humid months.
- Group by finish — bright sterling, matte German silver and dark tribal pieces need different light settings.
Which lighting setup keeps silver bright and texture visible?
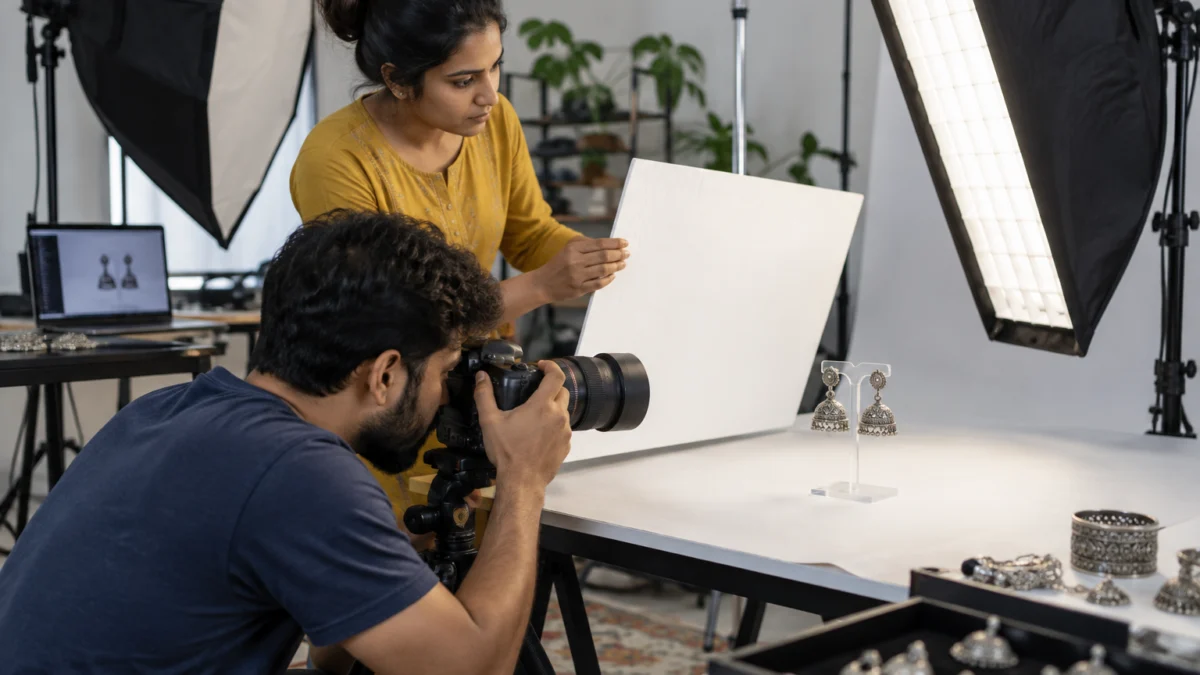
Use one long strip softbox as the main light, a white card to give the metal clean bright reflections, and a black card to add depth to edges and grooves. Keep every light the same colour temperature. This simple three-part setup makes silver read as bright and premium while the engraving stays sharp.
In oxidised jewellery photography, silver behaves like a mirror, so what you are really photographing is the reflection of your light sources. A long, even strip softbox creates a clean white line along curved surfaces, which our eyes read as “polished silver”. Small or bare lights create harsh hotspots that look cheap. We switch off all room lights and use only matched studio strobes, so one side of the piece never turns warmer than the other.
Lighting for sterling silver product photography
For bright sterling silver product photography — chains, pendants, rings and minimal studs — place the strip softbox close to the piece and slightly above it. Add large white cards on both sides so the metal reflects white instead of the studio. A light diffusion tent also works well for very shiny pieces because it wraps them in even white and removes your camera’s reflection.
Lighting for oxidised and tribal jewellery photography
For oxidised and tribal jewellery photography, drop the strip softbox lower and more to the side. The low angle “rakes” across the surface, catching the raised motifs and leaving the oxidised grooves dark, so the texture jumps out. A small white card on the opposite side lifts the shadows just enough. If the piece still looks flat, add a black card near the camera to darken reflections on the broad surfaces.
Movement also helps silver. A short clip of earrings swinging under a strip light shows how the metal catches light in a way a still image cannot. The clip below, shot in our mirror-box setup, shows that effect on a pair of earrings.
Which silver jewellery background should you choose?
Use pure white for marketplace main images, light grey for clean catalogue shots, and warm textured surfaces such as terracotta, jute or indigo cotton for lifestyle images. Warm or earthy backgrounds stop silver from looking cold, while white keeps it compliant with marketplace rules.
In oxidised jewellery photography, the right silver jewellery background depends on where the image will be used. A single product usually needs at least two: one strict white image for the listing and one styled image that sells the mood. Avoid dark blue or bright coloured backdrops near shiny silver — the metal reflects them and picks up an unnatural tint.
| Background | Best for | Watch out for |
|---|---|---|
| Pure white | Main image, marketplace listings | Silver can merge with white — use black cards for edge definition |
| Light grey | Website catalogue, website zoom images | Keep it neutral; a warm grey turns silver yellow |
| Slate or stone | Premium sterling and minimal pieces | Too dark a stone hides oxidised detail |
| Terracotta, jute, block-print cotton | Tribal, boho and oxidised lifestyle shots | Busy prints compete with intricate motifs |
| Off-white linen or cream velvet | Sets, gift boxes, festive campaigns | Velvet lint shows up in macro — lint-roll before shooting |
What camera settings and lens work best for silver jewellery photography?
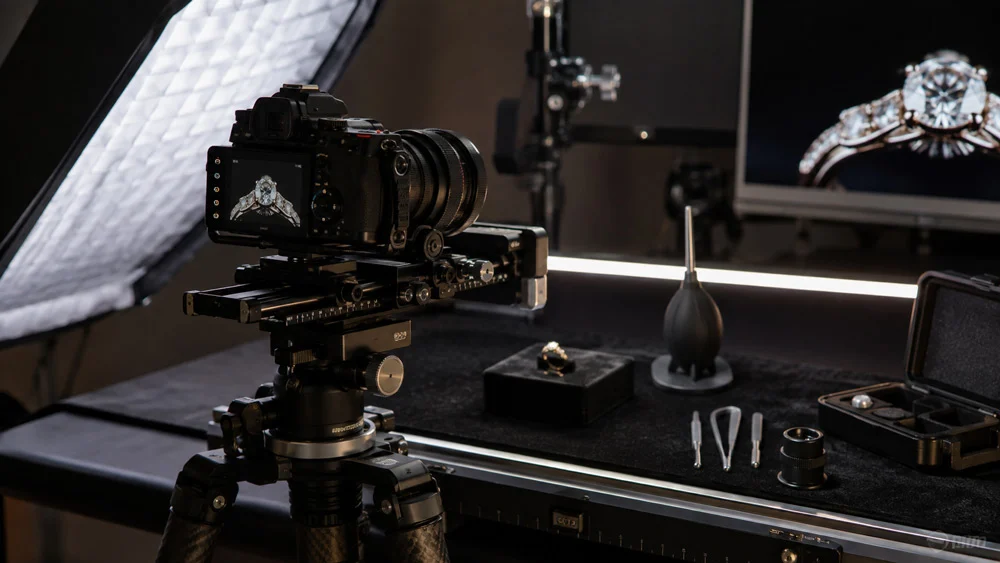
Use a 100mm macro lens on a tripod, shoot in RAW at ISO 100, choose an aperture around f/8 to f/11, and set a custom white balance from a grey card. For deep engraving or large tribal pieces, use focus stacking to keep the whole piece sharp from front to back.
- Lens: a 100mm macro gives true close-up detail and enough working distance to place cards without your reflection showing.
- Aperture: f/8–f/11 for single shots; going beyond f/16 softens detail because of diffraction.
- ISO and shutter: ISO 100 with strobes keeps grain out of smooth silver surfaces.
- White balance: shoot a grey card at the start of every setup and lock that value for all pieces.
- Focus stacking: combine several frames focused at different depths for chokers, kadas and thick cuffs.
- Tethering: view frames on a calibrated laptop screen, never only on the camera’s small display.
If you want to go deeper into close-up technique, our guide to macro photography for rings, gemstones and engravings explains focus stacking step by step. The same method works brilliantly for the fine filigree on German silver jewellery photography.
Which 9 shots sell oxidised and silver jewellery online?
A complete silver listing needs a white hero, a 45° angle, a macro texture shot, a back and clasp shot, a scale shot, an on-body image, a lifestyle image, a set or pair flat lay, and a short video. Together these nine oxidised jewellery product photos answer almost every question a buyer has before ordering.
This is the shot list Uniqs Studio uses as a starting point for most oxidised and silver orders. Smaller catalogues can start with shots 1, 3, 5 and 6, then add the rest for best-sellers.
1. The white-background hero shot
The front view on pure white, centred and filling most of the frame. This is the image that appears in search results, so the silver must look bright and neutral, with black-card edges so it does not dissolve into the background.
2. The 45° angle shot
A slightly turned view shows depth, thickness and how the piece is built. For jhumkas and chandbalis, this angle reveals the dome shape and the hanging beads that a flat front view hides.
3. The macro texture shot
This is where oxidised jewellery photography earns its money. A tight crop of the engraving, filigree or hammered surface proves the craftsmanship and justifies the price. Light it with the low raking strip softbox so every groove reads clearly.
4. The back, clasp and hallmark shot
Buyers want to know how the piece closes and whether it is genuine. Show the screw-back, hook or lobster clasp, and the 925 stamp on sterling silver pieces. Clear proof of material builds trust faster than any description.
5. The scale shot
Silver statement pieces often look smaller or larger than expected. A shot beside a hand, coin-free ruler or simple prop removes the guesswork and reduces size-related returns.
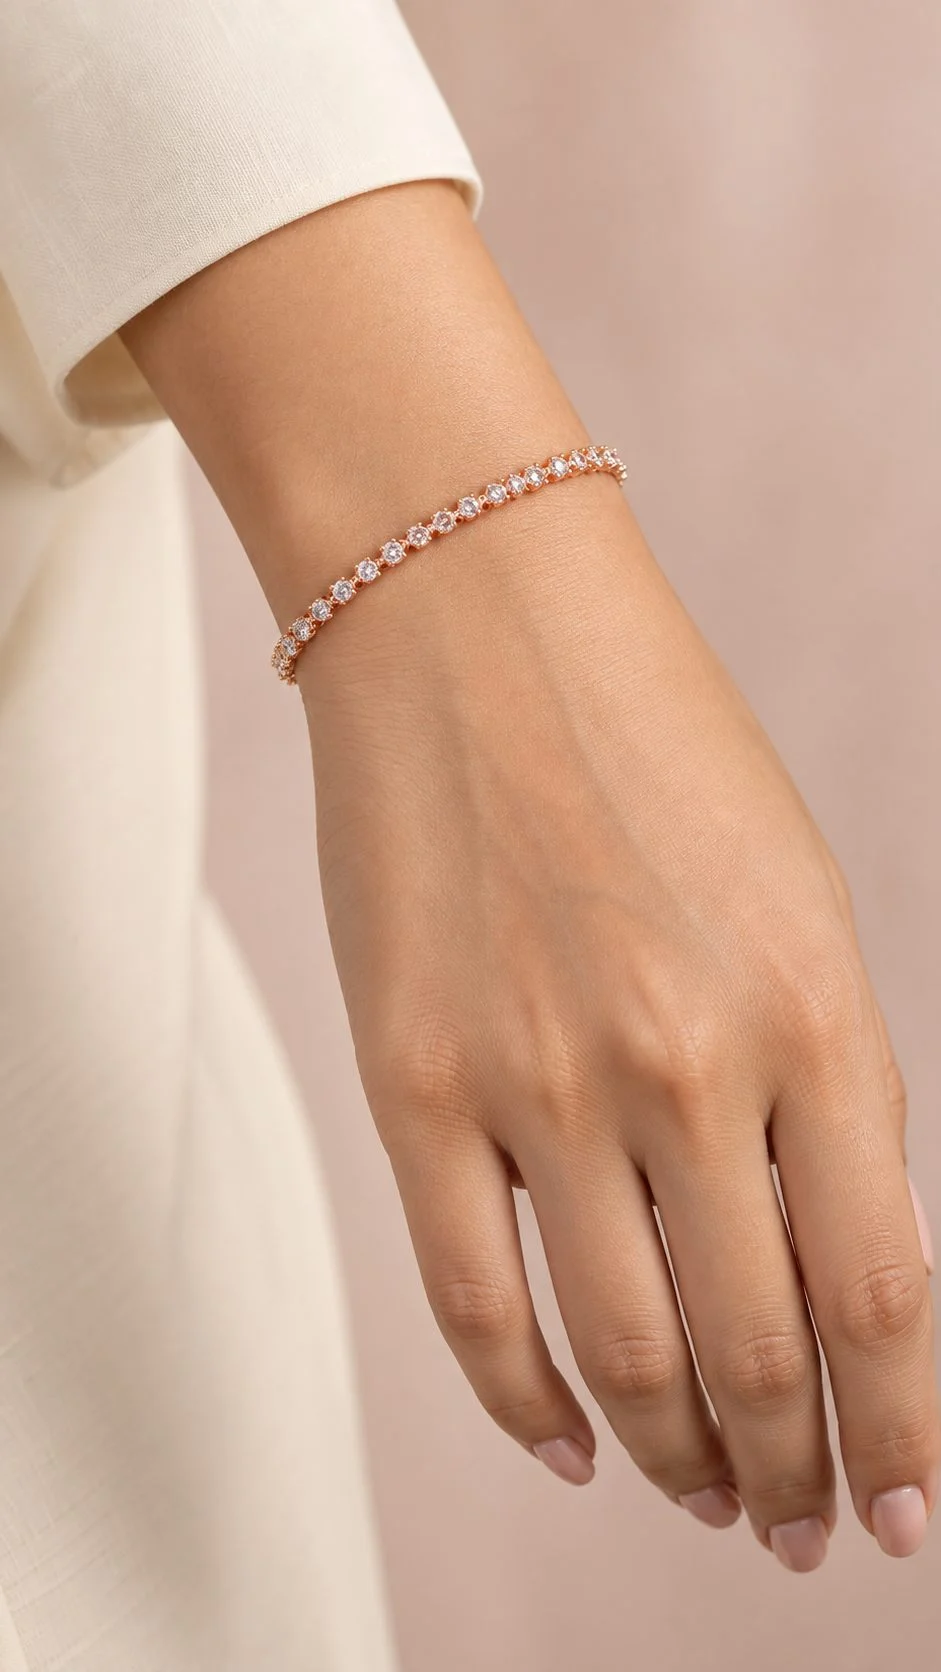
6. The on-body shot
Oxidised jewellery is bought for the look it creates with an outfit. A neck, ear, wrist or ankle crop on a model shows drape, weight and proportion. For full looks with ethnic or indo-western outfits, our on-model fashion shoots pair the jewellery with styling that fits the brand.
7. The styled lifestyle shot
Place the piece on jute, terracotta, a block-printed dupatta or a wooden tray with props that match the brand story. This image works hard on Instagram, your own website and A+ style banners.
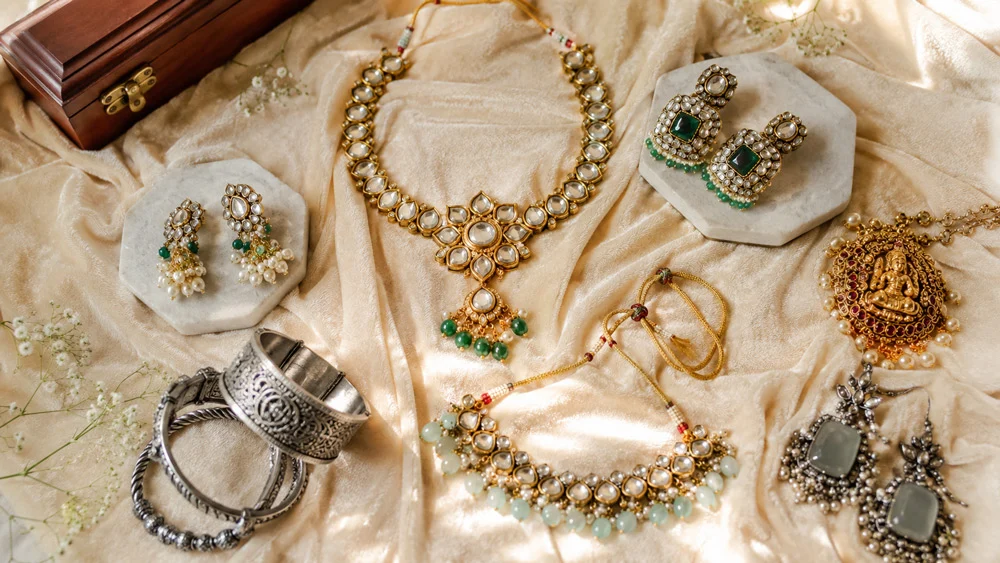
8. The set or pair flat lay
Necklace-and-earring sets, bangle stacks and toe-ring pairs sell better when buyers see everything included. A neat top-down flat lay shows the full set in one frame and makes combo listings clear.
9. The short video
A 20–25 second clip of the piece turning, swinging or being worn shows the shine that stills can only suggest. Our team shoots ecommerce videos for jewellery in the same session as the photos, so lighting and colour match across the whole listing.
How do you retouch silver tones without making them look fake?
Neutralise the colour first, then remove dust and small scratches, and protect the black oxidation throughout. Silver should look clean and true, not chrome-plated. If a retouched image looks brighter or whiter than the real piece in hand, buyers will notice the difference on delivery.
Our retouchers follow a simple order for silver. First they correct white balance against the grey card shot, so there is no blue or yellow tint left. Then they clean dust, lint and fingerprints, and soften tiny scratches on polished areas. Finally they check contrast so the grooves stay deep black and the highlights do not clip to pure white. For a full walk-through of this stage, see our guide on jewellery post-production after the shoot.
- Do remove light tarnish spots that are not part of the finish.
- Do keep tones consistent across every image of the same product.
- Don’t brighten the oxidised grooves — that erases the design.
- Don’t add fake sparkle or change the metal colour; it causes “not as shown” complaints.
How should Meesho, Myntra and Amazon sellers adapt silver jewellery photos?
Keep the same shoot, but export to each marketplace’s rules: a clean white main image, the right size and ratio, and no text or watermarks on the primary photo. Silver needs extra edge definition on white, because grey metal can blend into the background on small mobile thumbnails.
Jewellery photography for Meesho and Myntra has slightly different priorities. Meesho buyers browse fast on budget phones, so bold, centred hero images win; our Meesho jewellery image guidelines explain the mobile-first approach. Myntra puts more weight on on-body styling and consistent catalogue looks, which our Myntra jewellery photo rules cover in detail. On Amazon, follow the main-image rules and use the remaining slots for macro, scale and lifestyle shots.
Whatever the platform, good image SEO helps too. Descriptive file names and alt text, as recommended in Google’s image SEO guidelines, make your silver pieces easier to find on your own website.
Which mistakes ruin oxidised jewellery photography?
The biggest mistakes are shooting under mixed room light, trusting auto white balance, polishing away the patina and using one small hard light. Each of these makes silver look grey, blue or cheap — and every one of them is easy to avoid with a little planning.
- Mixed light sources: window light plus LED panels gives two colours on one piece.
- Auto white balance: neutral metal drifts blue from shot to shot.
- Over-polishing: removing oxidation from recesses destroys the design contrast.
- Small, bare lights: harsh hotspots and blown highlights instead of smooth silver lines.
- Coloured surroundings: a blue wall or red shirt reflects straight into shiny silver.
- Skipping the macro shot: buyers never see the handwork they are paying for.
- Using AI-generated jewellery images: they invent details and finishes that the real piece does not have, which leads to complaints.
How much does professional silver jewellery photography cost?
At Uniqs Studio, jewellery packshots such as rings and earrings cost ₹300 per product for 2–3 angles, with a 4–5 day turnaround. Model photography and short reels are priced separately per product, as listed in the table below.
| Shoot type | Images | Turnaround | Price |
|---|---|---|---|
| Jewellery (ring, earring) | 2–3 angles | 4–5 days | ₹300 / product |
| Model Photography | 5–6 angles | 4–5 days | ₹400 / product |
| Ecommerce Reels Video | 20–25 seconds | 4–5 days | ₹900 / product |
Prices are per product/image as listed; call or WhatsApp +91-8076745824 for bulk catalogue quotes.
Use this checklist before your next silver jewellery shoot
Run through this list before the first frame. It covers the preparation, lighting and output checks that make the biggest difference in oxidised jewellery photography and to how silver looks online, whether you shoot in-house or brief a studio.
- Pieces cleaned on high points only; oxidised grooves left untouched
- Gloves, air blower, soft brush and anti-tarnish pouches on set
- All room lights off; only matched studio lights in use
- Strip softbox, white cards and black cards positioned
- Grey card shot and custom white balance locked
- Macro lens on tripod, RAW, ISO 100, f/8–f/11
- Shot list of 9 images agreed for hero products
- Marketplace sizes and white-background rules confirmed
- Retouch brief: neutral tone, keep blacks, dust only
Frequently asked questions about oxidised jewellery photography
These are the questions silver and oxidised jewellery sellers ask the Uniqs Studio team most often before booking a shoot.
Light it with a long strip softbox and surround it with white cards so the metal reflects bright white instead of the room. Set a custom white balance from a grey card and add a black card near the edges for definition.
Pure white for marketplace main images, and warm textured surfaces like terracotta, jute or block-printed cotton for lifestyle shots. Warm backgrounds stop oxidised silver from looking cold and highlight its handcrafted feel.
Usually because of auto white balance or mixed light sources. Switch off room lights, use lights of one colour temperature and set white balance from a grey card so the silver stays neutral.
Only the raised, polished areas. The dark oxidation in the recesses is part of the design, so clear dust from grooves with a soft brush and air blower instead of polishing them.
Jewellery packshots for rings and earrings cost ₹300 per product for 2–3 angles with a 4–5 day turnaround. Model photography is ₹400 per product and ecommerce reels are ₹900 per product.
The basics are the same, but German silver and tribal pieces need a lower, more side-on light to bring out texture and engraving, while sterling silver needs broader, brighter reflections for a polished look.
What should you do next with your silver jewellery images?
Start by auditing your current listings against the 9-shot list and the checklist above. Fix the white balance and lighting first, because those two changes alone transform how silver looks. Then decide whether to keep shooting in-house or work with a specialist studio.
Great oxidised jewellery photography is a mix of careful prep, controlled light and honest retouching, and it pays back through better click-through and fewer returns. If you are weighing up a professional partner, the next step is our guide on how to choose the right jewellery photographer, which walks you through portfolio checks, questions to ask and red flags. You can also email [email protected] with photos of your pieces for a quick shot plan.